The Ottimate mobile app lets you upload invoices and receipts, review invoices and payments, submit reimbursement requests, and manage card activity.
The options available may depend on your role and your company’s Ottimate configuration.
Upload invoices and receipts
From the bottom navigation, tap Uploads.
To upload an invoice:
Tap Upload Invoices.
Capture the invoice using your camera or select an existing image.
Review the image and upload it.
Use the menu beside Upload Invoices to access any additional invoice-upload options.
To upload a receipt for an expense, tap Upload Receipt.
Pending uploads remain on this screen until processing is complete.
View invoices
From the bottom navigation, tap Invoices.
Use the controls at the top of the page to search, sort, or filter invoices.
Tap an invoice to review its details, images, coding, and history.
Approve an invoice
Open the My Approvals view to see invoices awaiting your approval.
Select an invoice, review the available details, and use the approval action shown in the app.
Use All Invoices to view invoices that do not require your approval.
View payments
From the bottom navigation, tap Cards. Tap the overflow menu and select Payments.
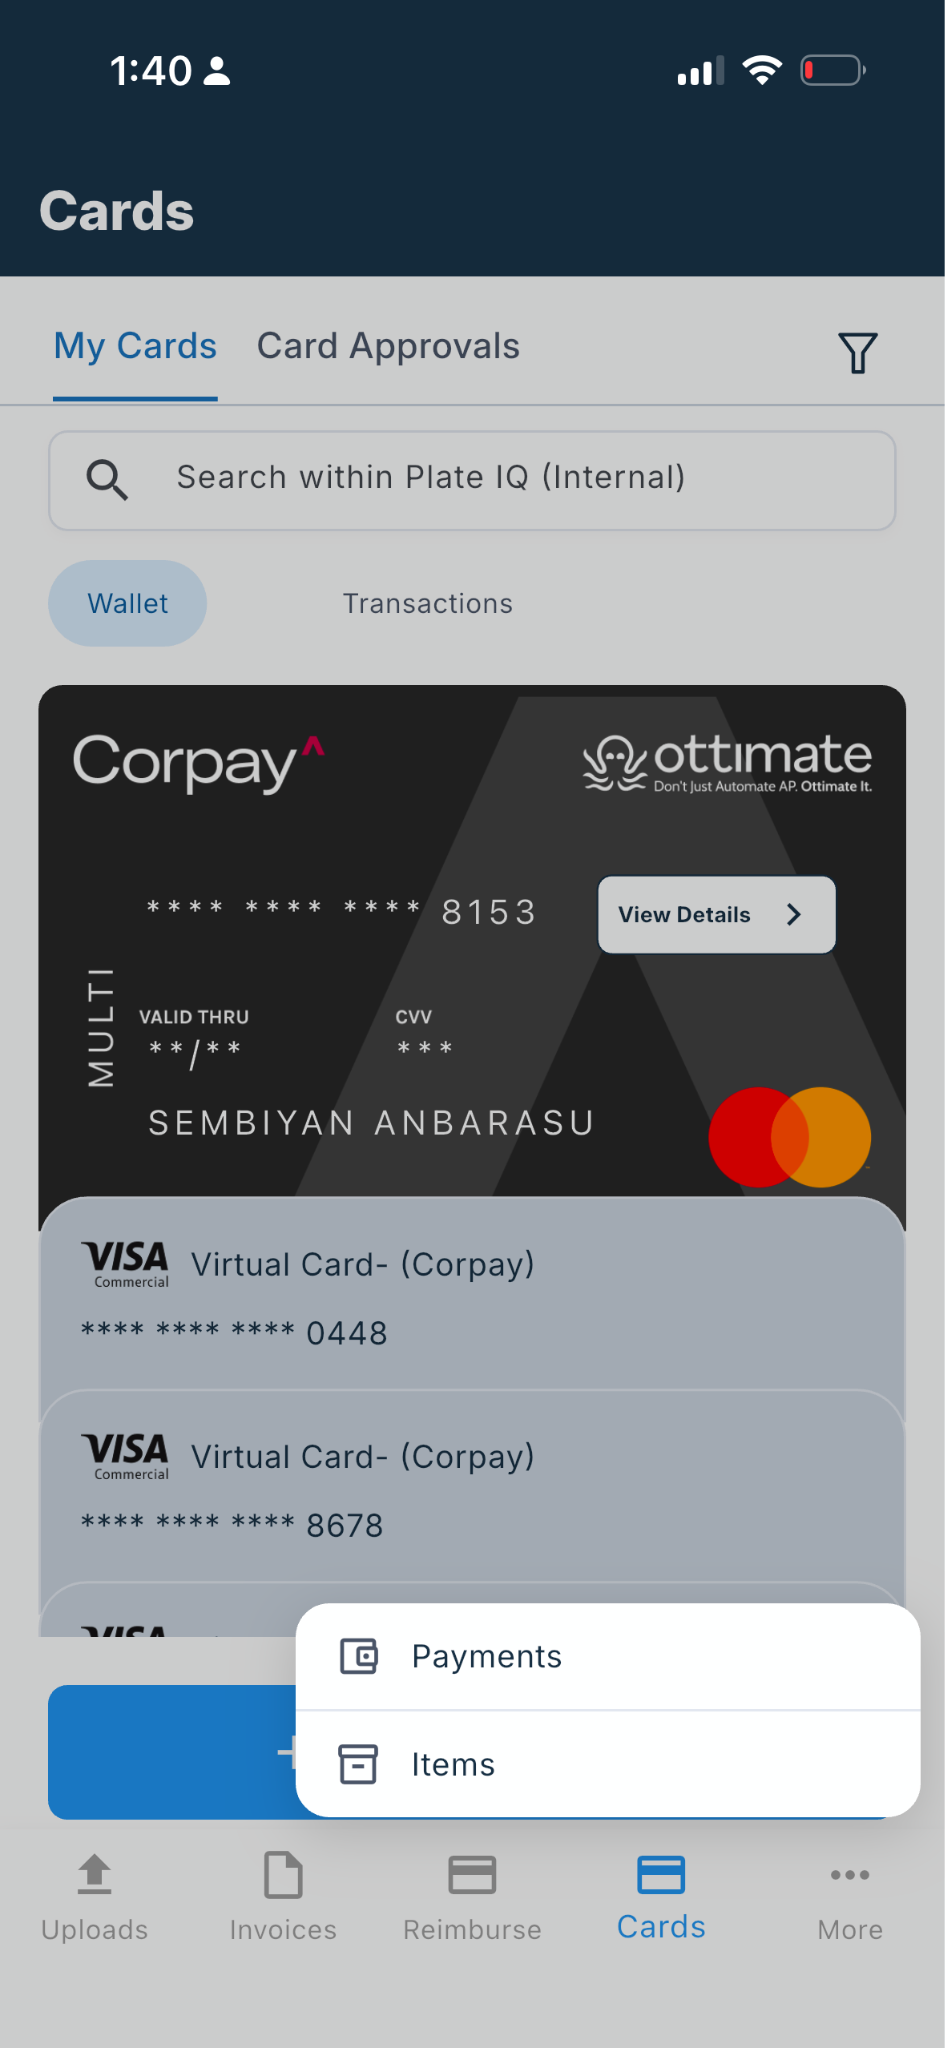
Use the controls at the top of the page to search, sort, or filter payments.
Tap a payment to review its details.
Use the available tabs to review the invoices and check-status information associated with the payment.
Approve a payment
Open the payment approval view and select a payment awaiting your approval.
Review the payment details and use the approval action shown in the app.
View items
From Cards, tap the overflow menu and select Items.
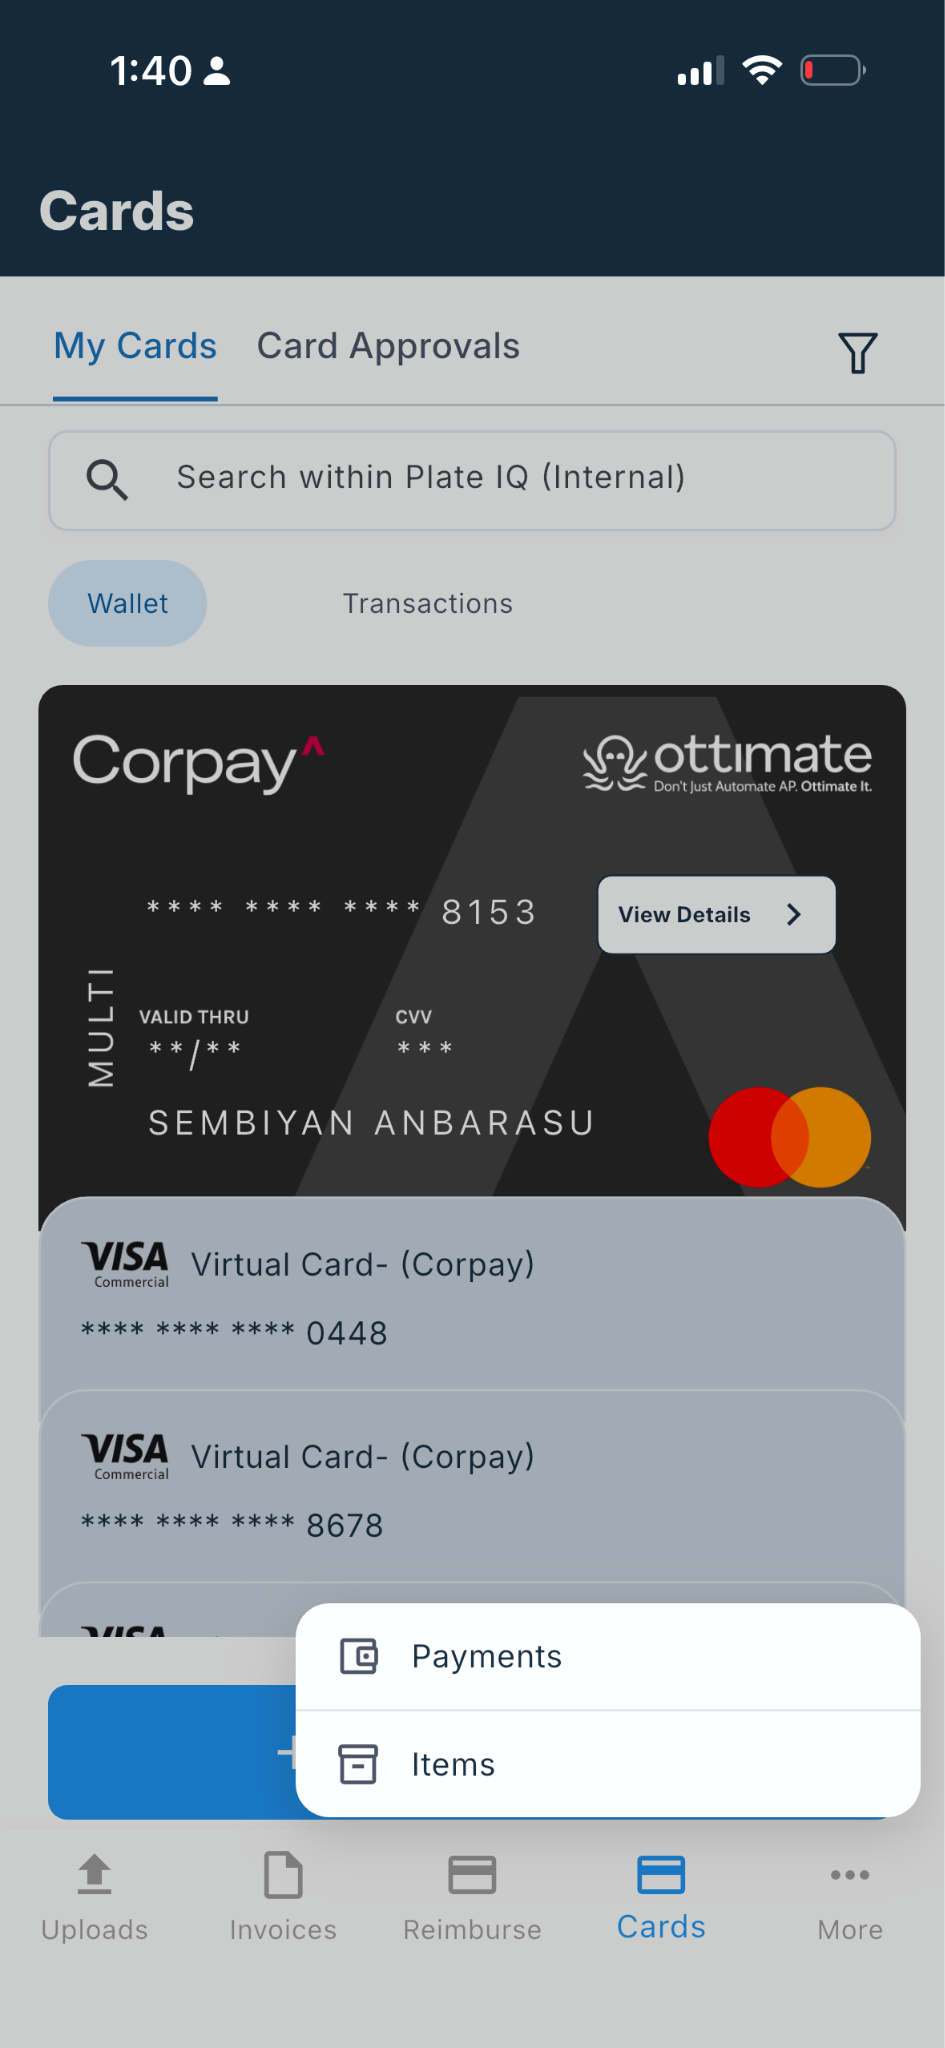
Search or filter the item list, then select an item to review its details and associated invoices.
Create a reimbursement request
From the bottom navigation, tap Reimburse.
The My Requests tab shows your draft and submitted reimbursement requests.
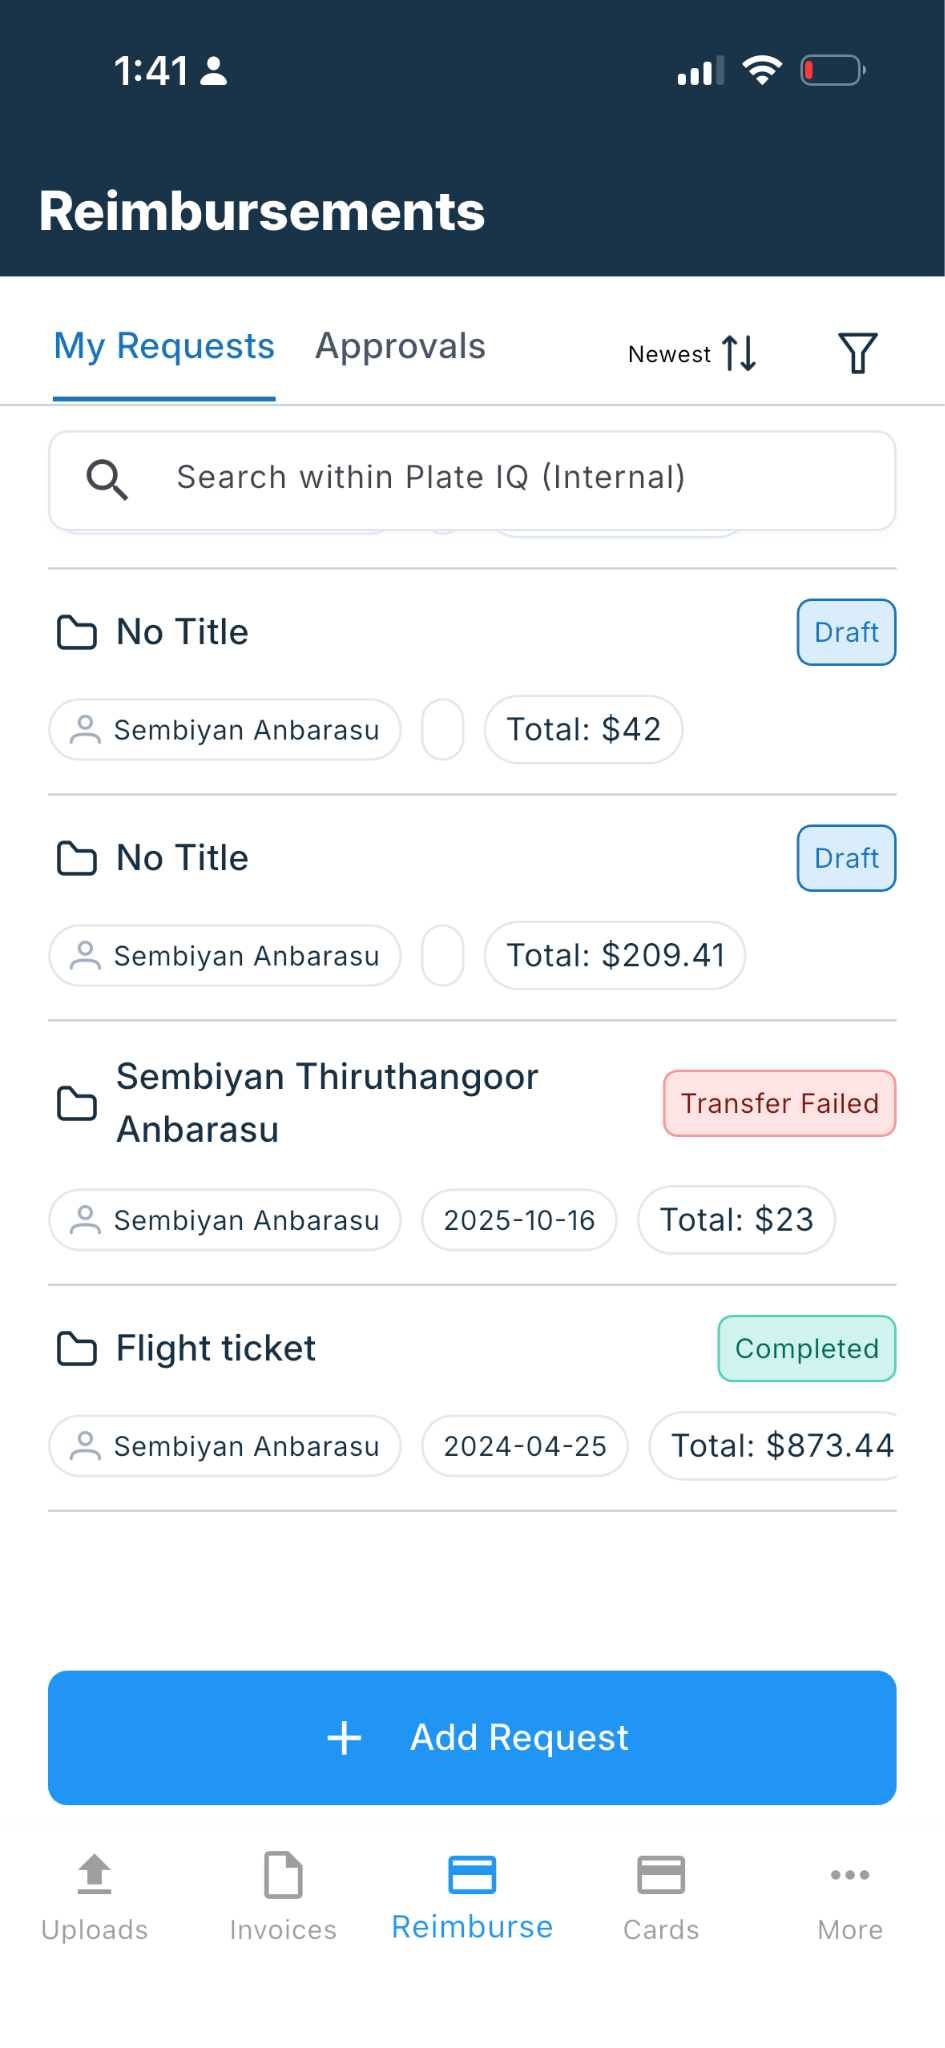
Tap Add Request to begin.
You can add a general expense, a mileage expense, or both.
Add a general expense
Keep General selected.
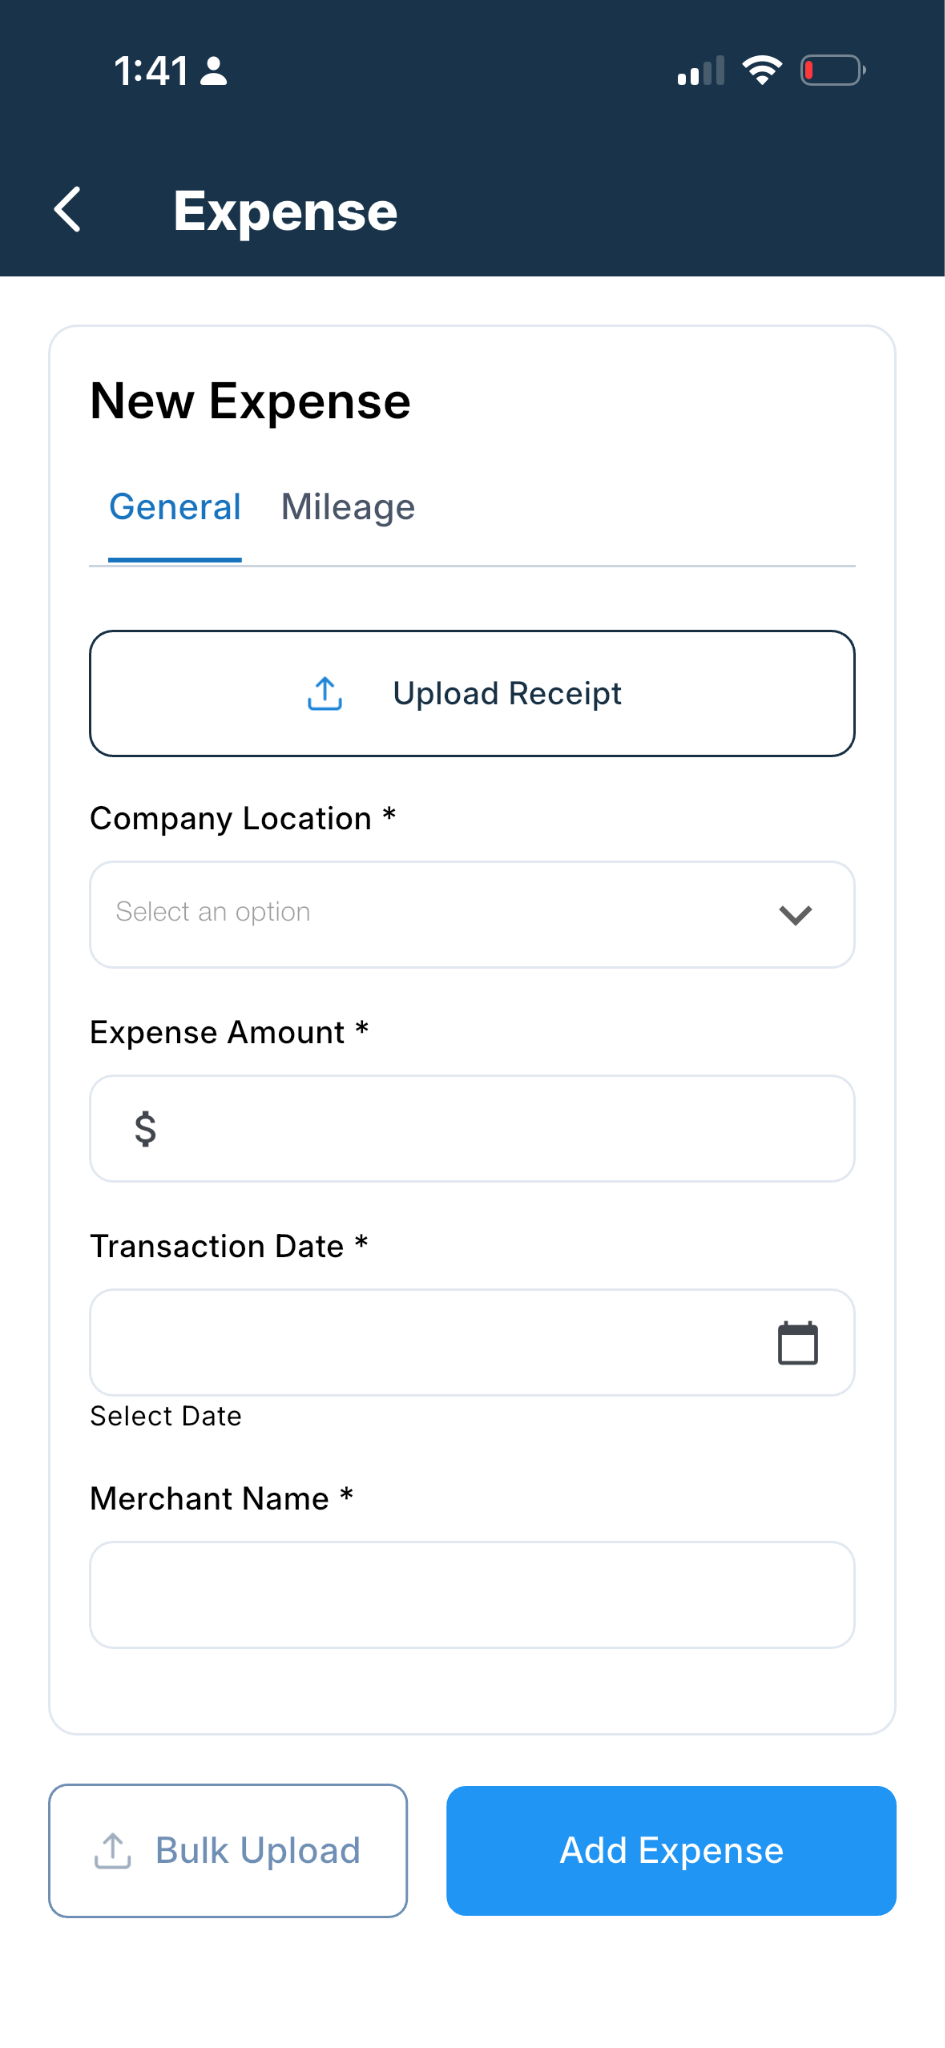
Enter the required expense information:
Select the company location.
Enter the expense amount.
Select the transaction date.
Enter the merchant name.
Complete any additional required fields.
To attach a receipt, tap Upload Receipt.
You can:
Scan the receipt with your camera.
Upload it from your gallery.
Upload it from your files.
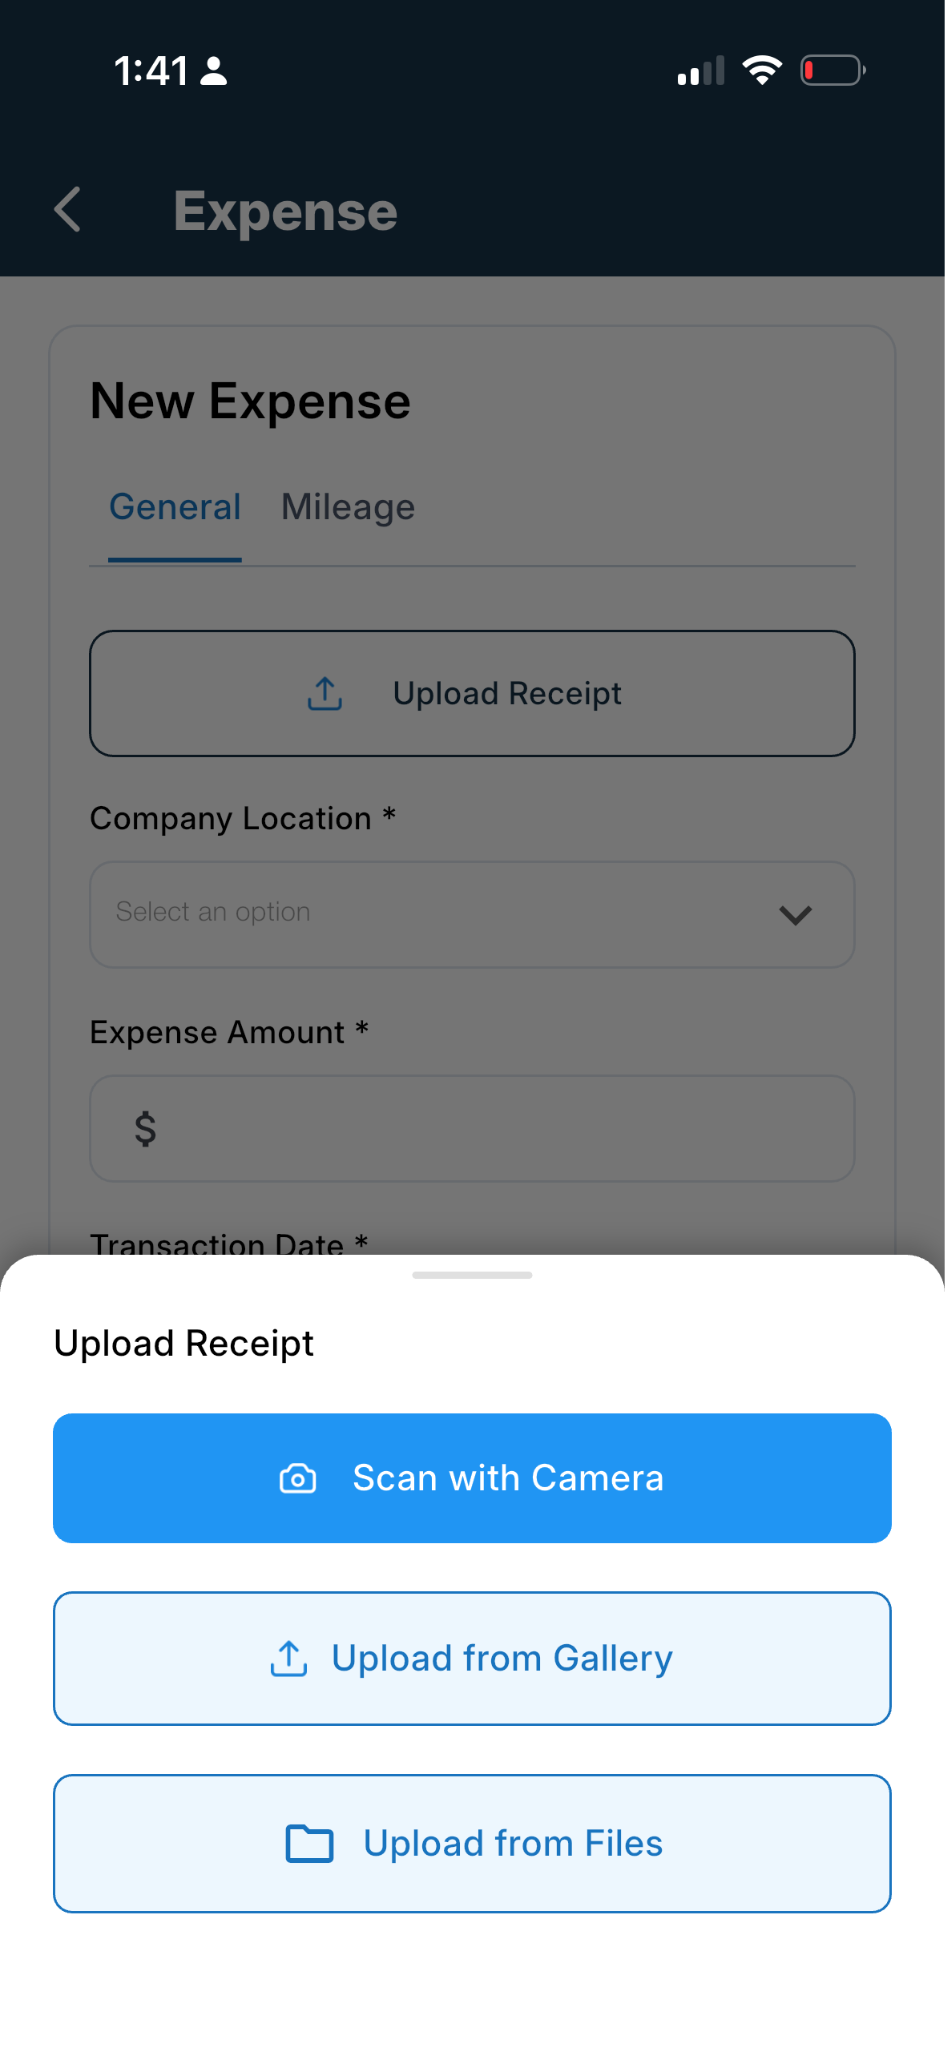
When possible, Ottimate reads the receipt and fills in information such as the amount, transaction date, and merchant.
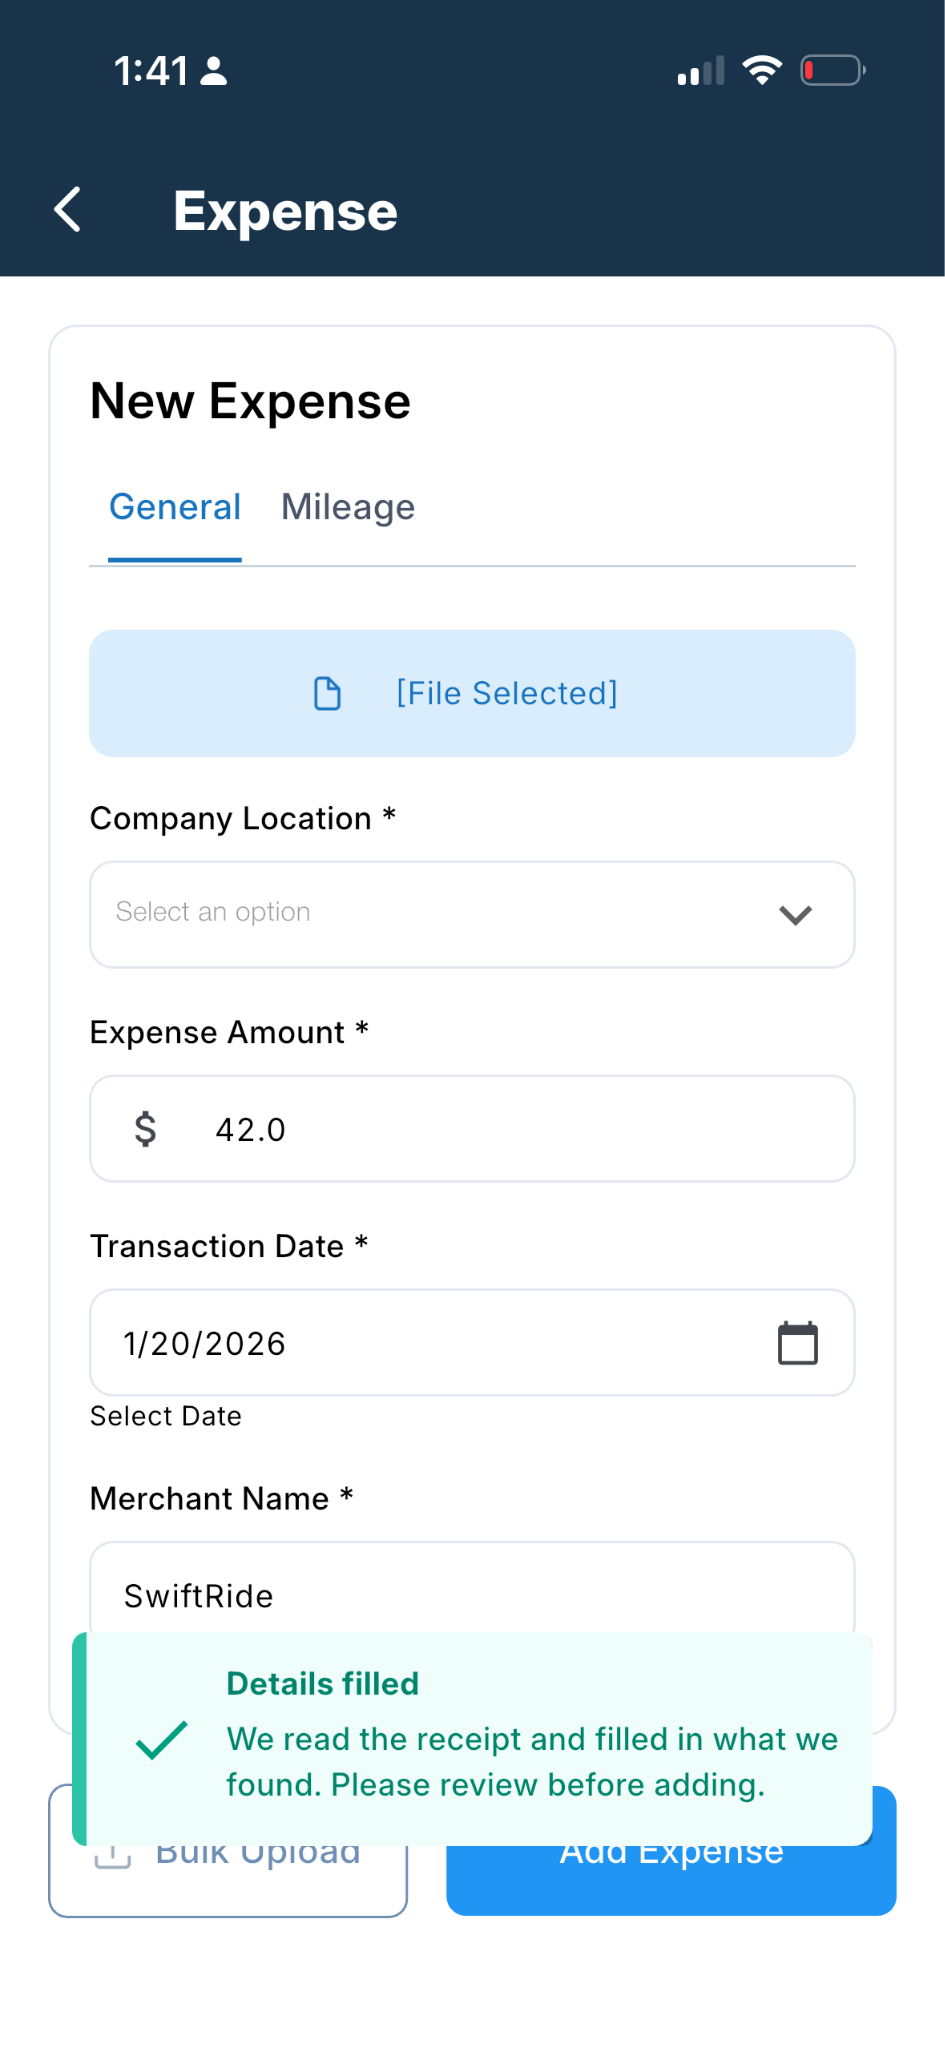
Review all populated information, select the company location, and make any required changes before tapping Add Expense.
Add a mileage expense
Select Mileage.
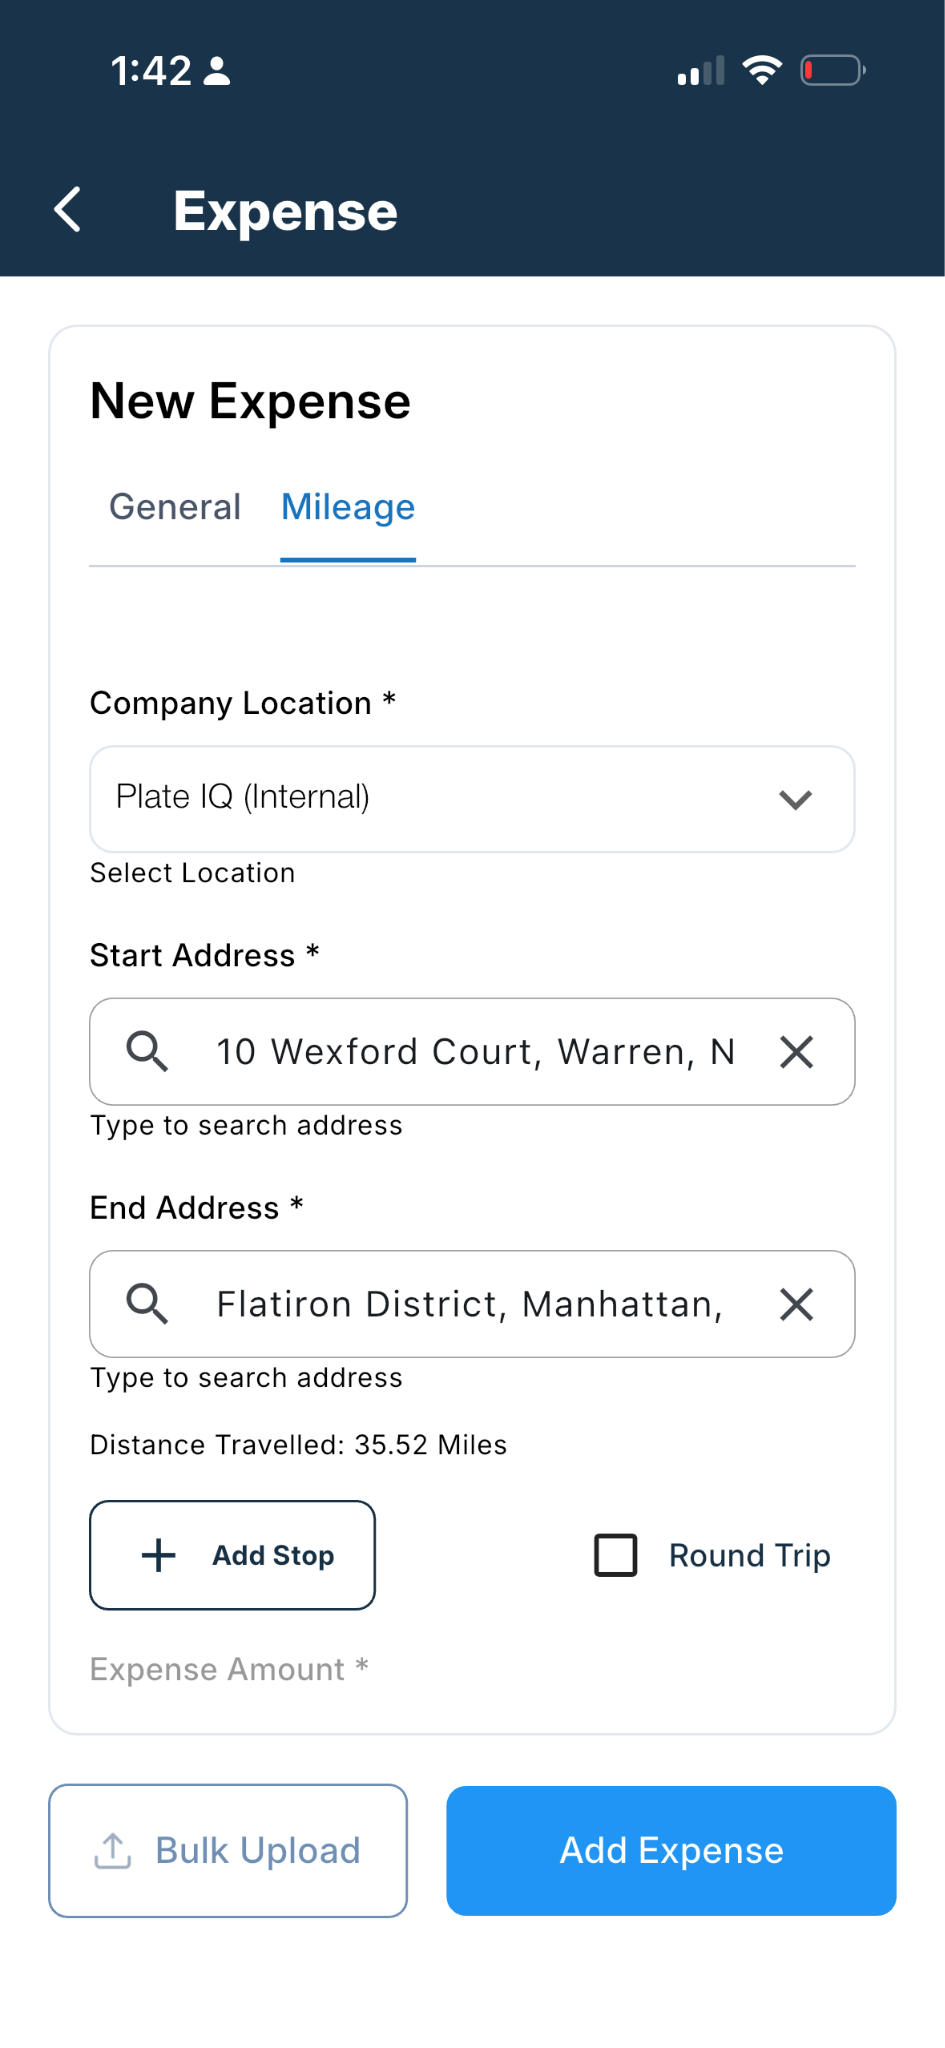
Select the company location.
Enter the starting address.
Enter the destination address.
Tap Add Stop if the trip includes additional stops.
Select Round Trip when applicable.
Ottimate calculates the distance and reimbursement amount based on the route and your company’s configured mileage rate.
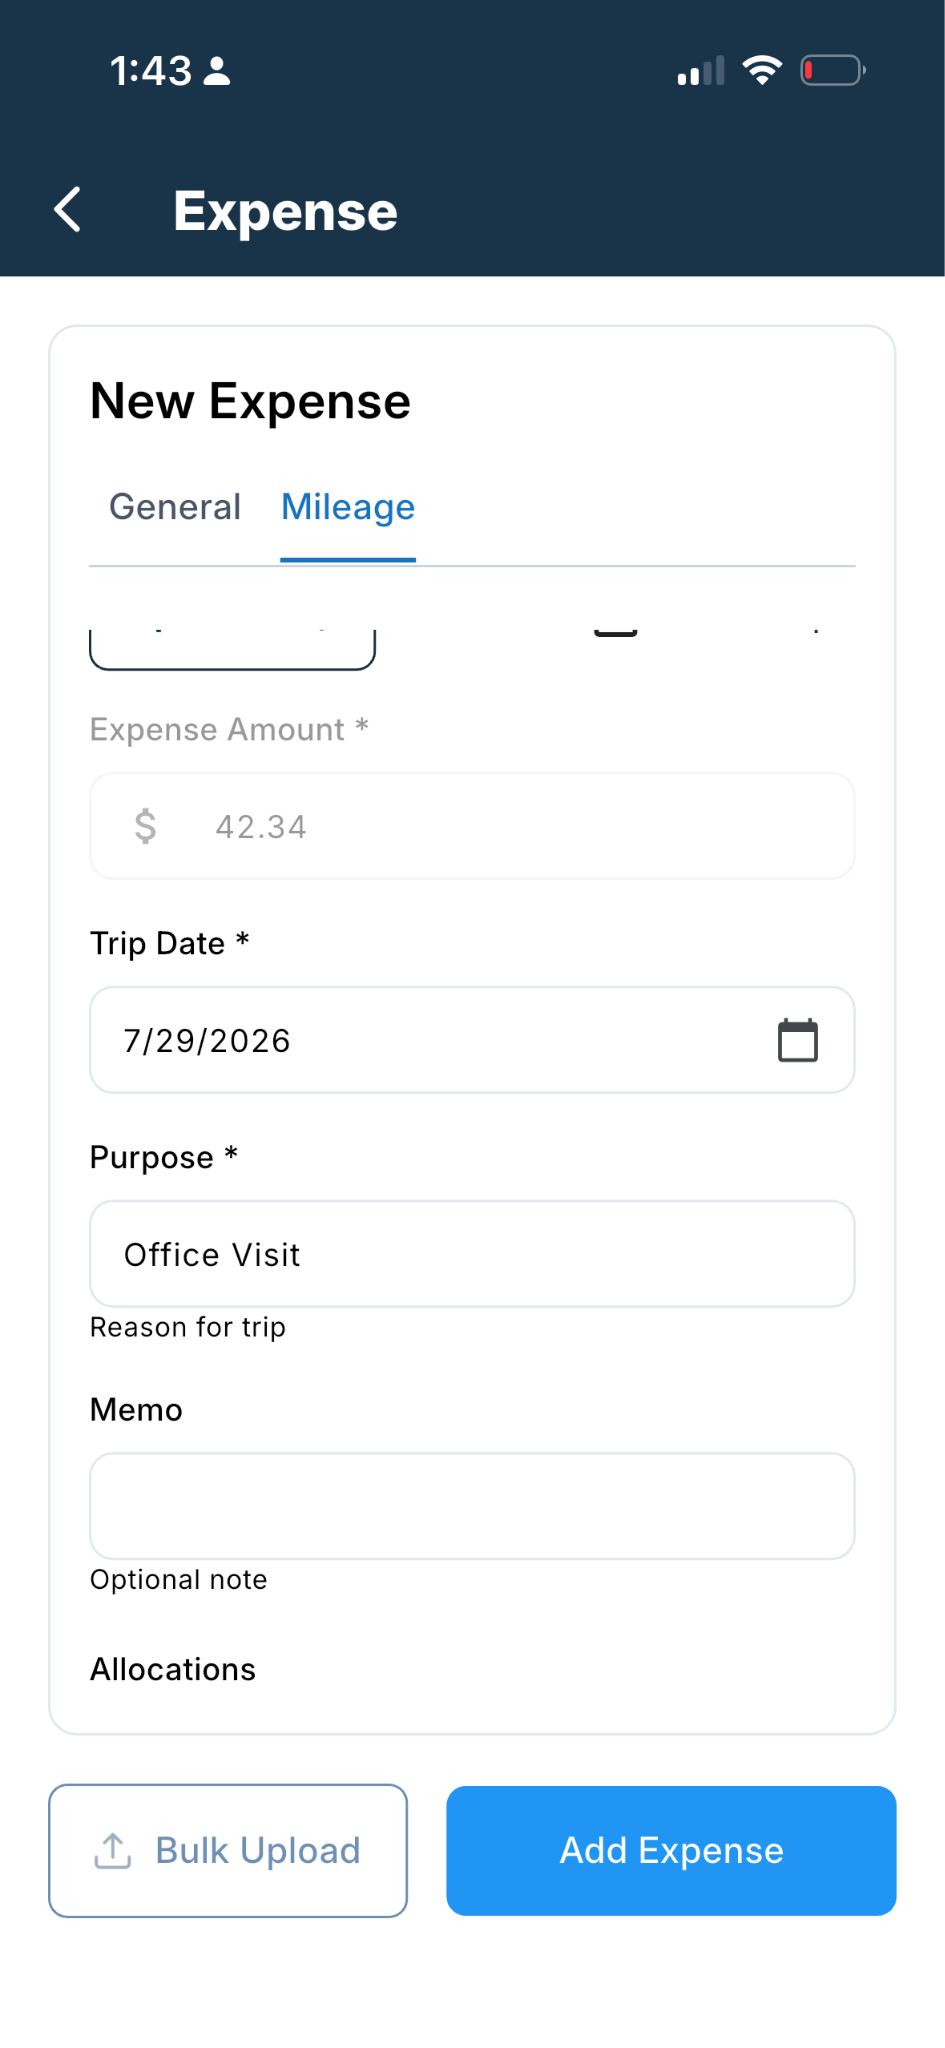
Enter the trip date, purpose, optional memo, and any required allocations. Then tap Add Expense.
Submit one expense or create an expense report
After adding an expense, review its information on the Summary page.
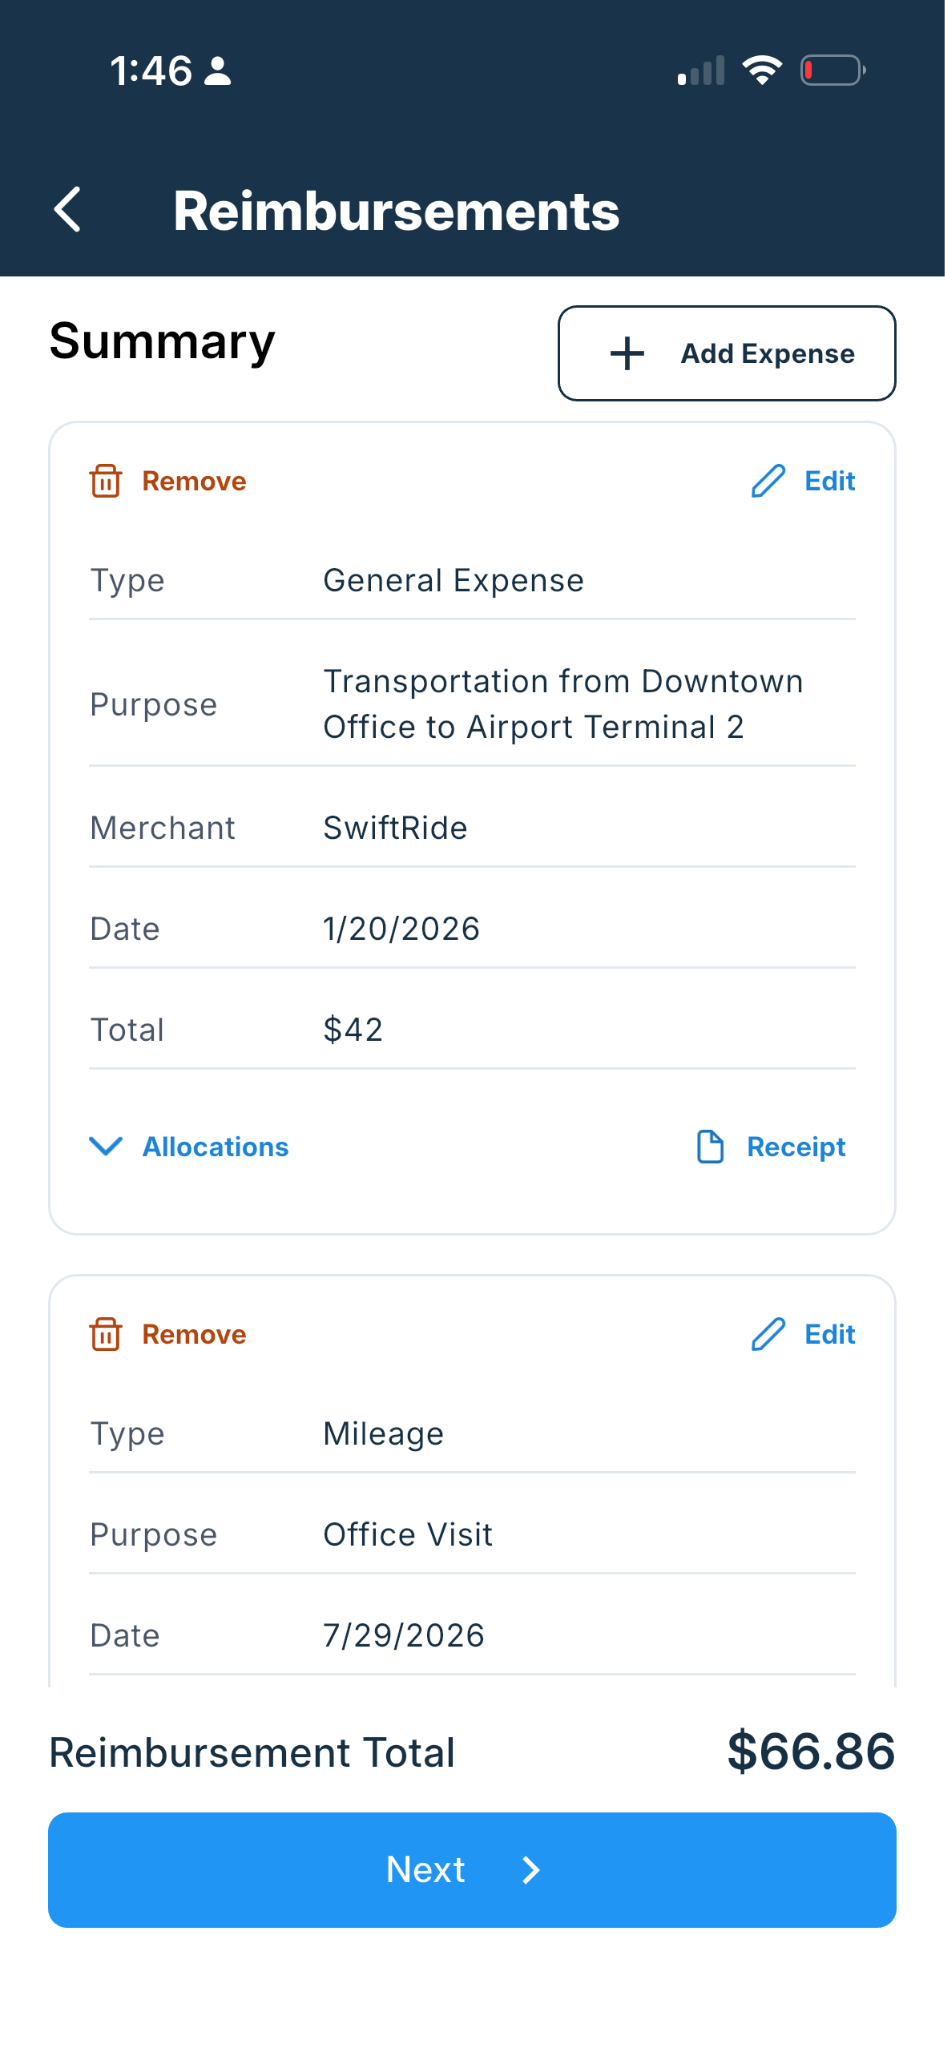
You can:
Edit or remove an expense.
Review its allocations.
Open the attached receipt.
Tap Add Expense to include another expense.
Submitting one expense
If the request contains only one general or mileage expense, continue from the Summary page and submit the reimbursement directly.
Submitting multiple expenses
If you add more than one expense, Ottimate automatically treats the request as an expense report.
Tap Next, then enter:
Report name
Reimbursement location
Expense report date
Optional memo
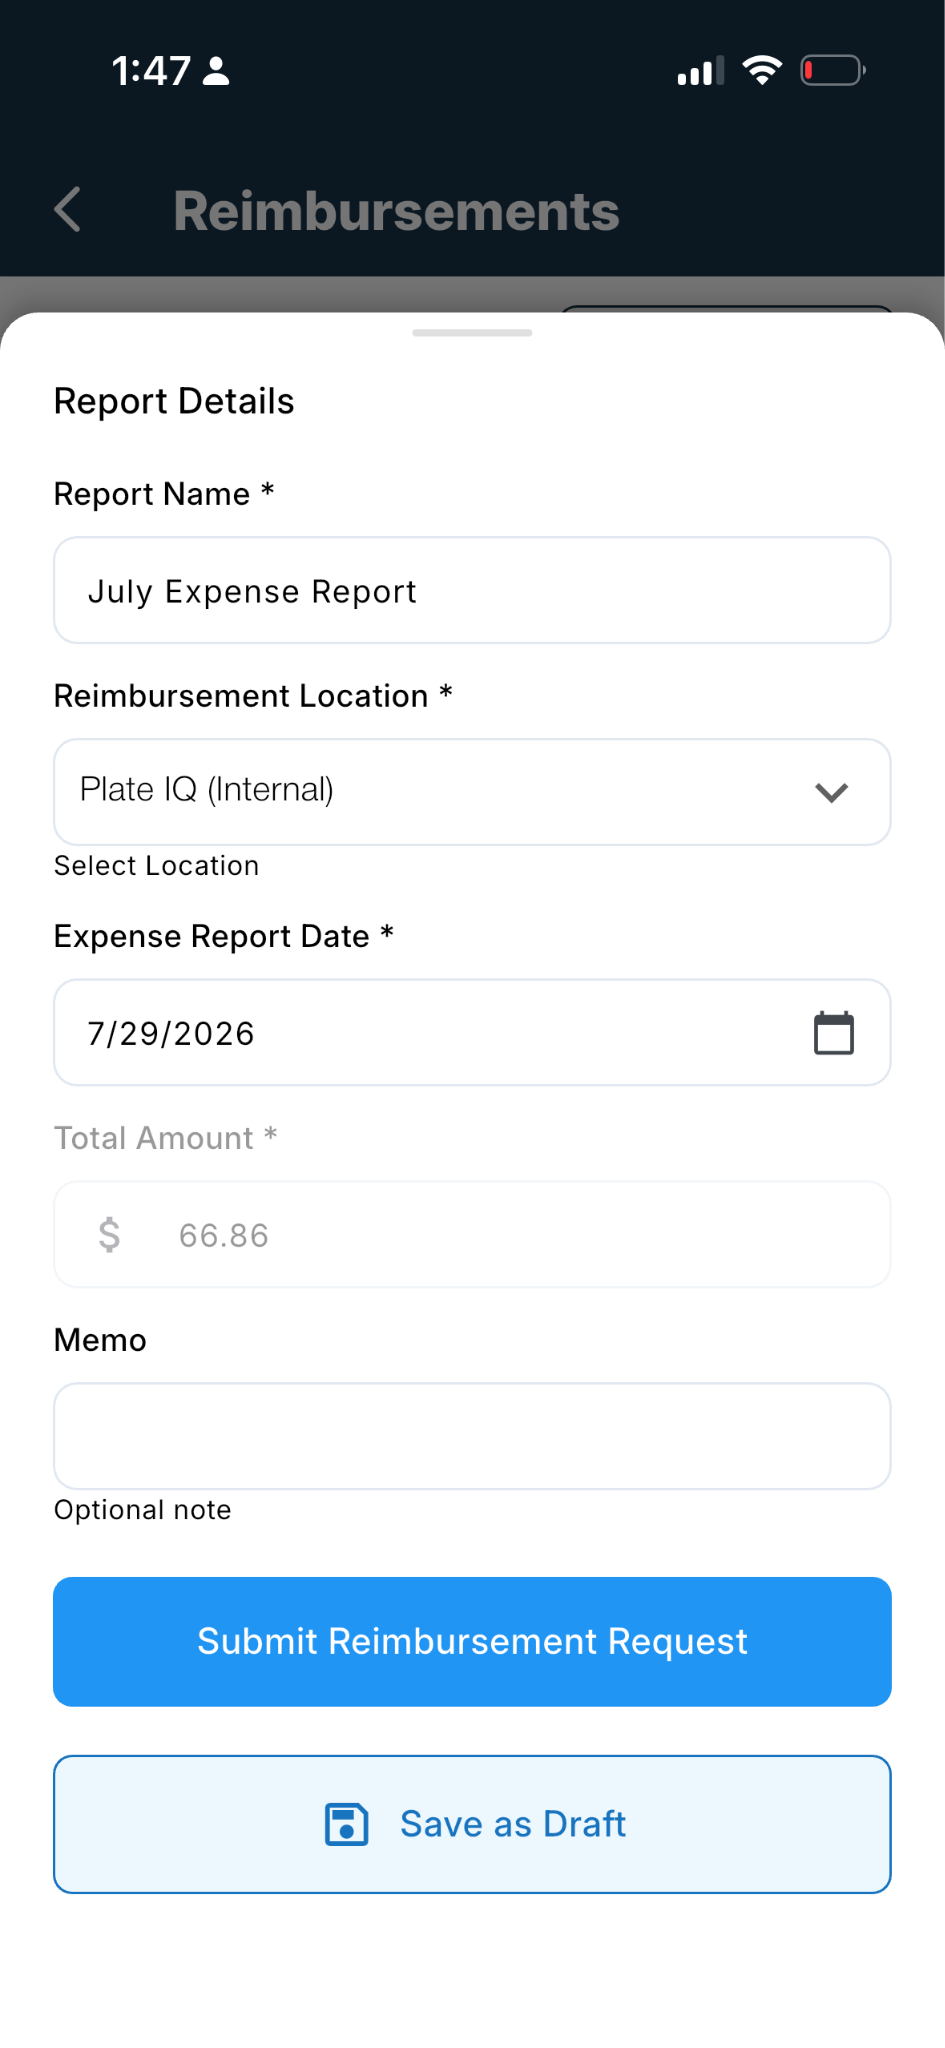
Tap Submit Reimbursement Request to send the report for review.
To finish it later, tap Save as Draft.
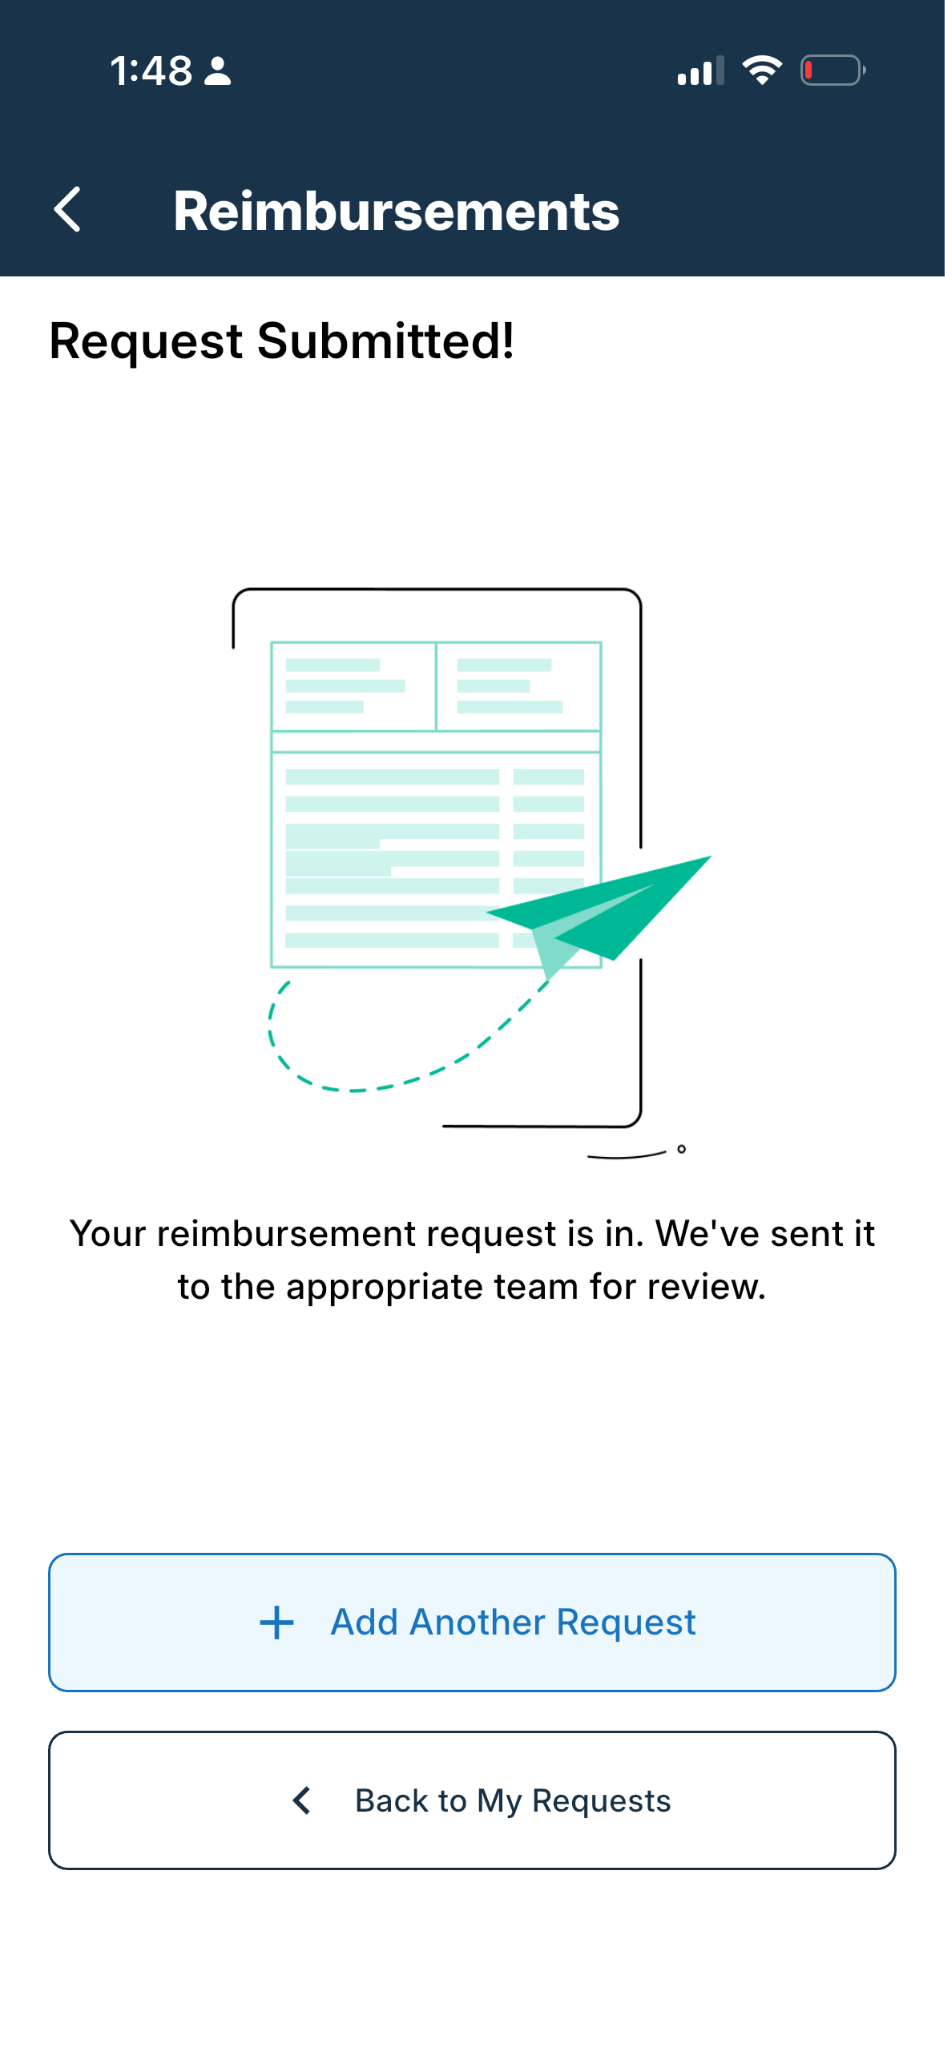
After submission, Ottimate confirms that the request has been sent to the appropriate team.
Track reimbursement requests
Open Reimburse and select My Requests.
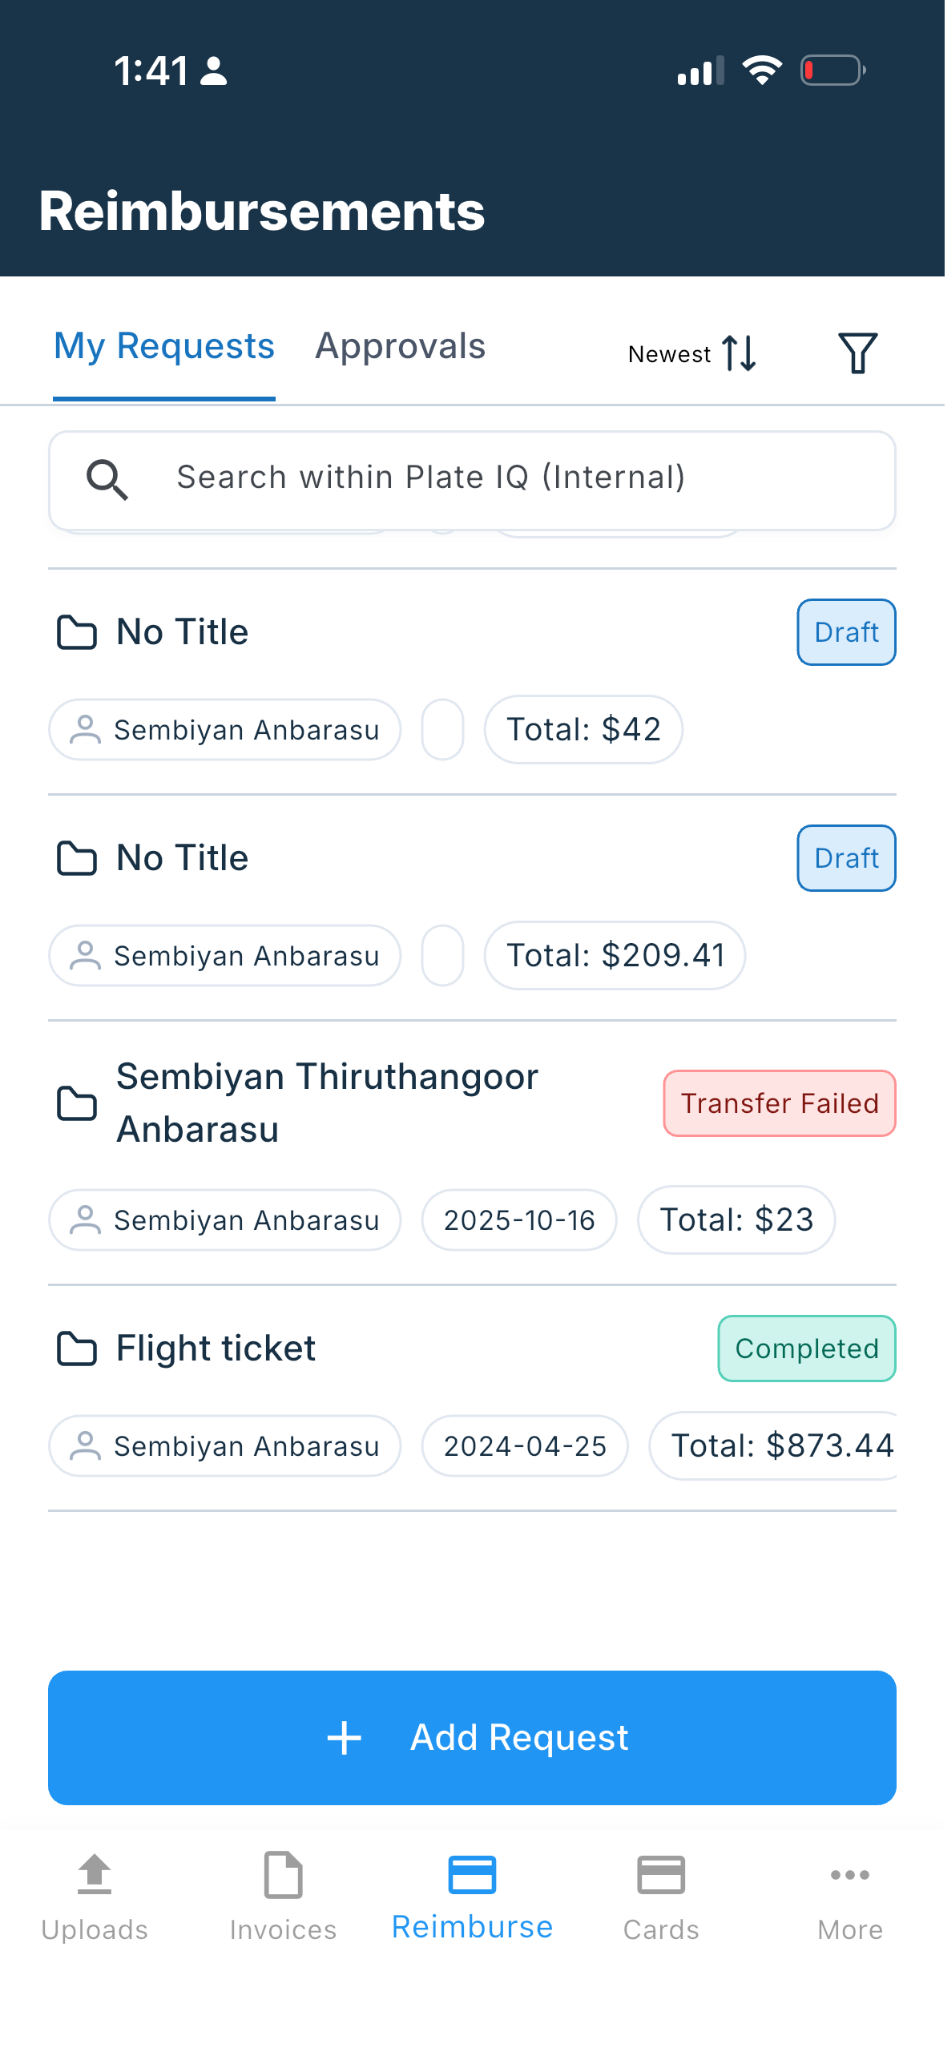
The list displays the status and total for each request. Select a request to review its expenses and other details.
Approve reimbursement requests
Open Reimburse and select Approvals.
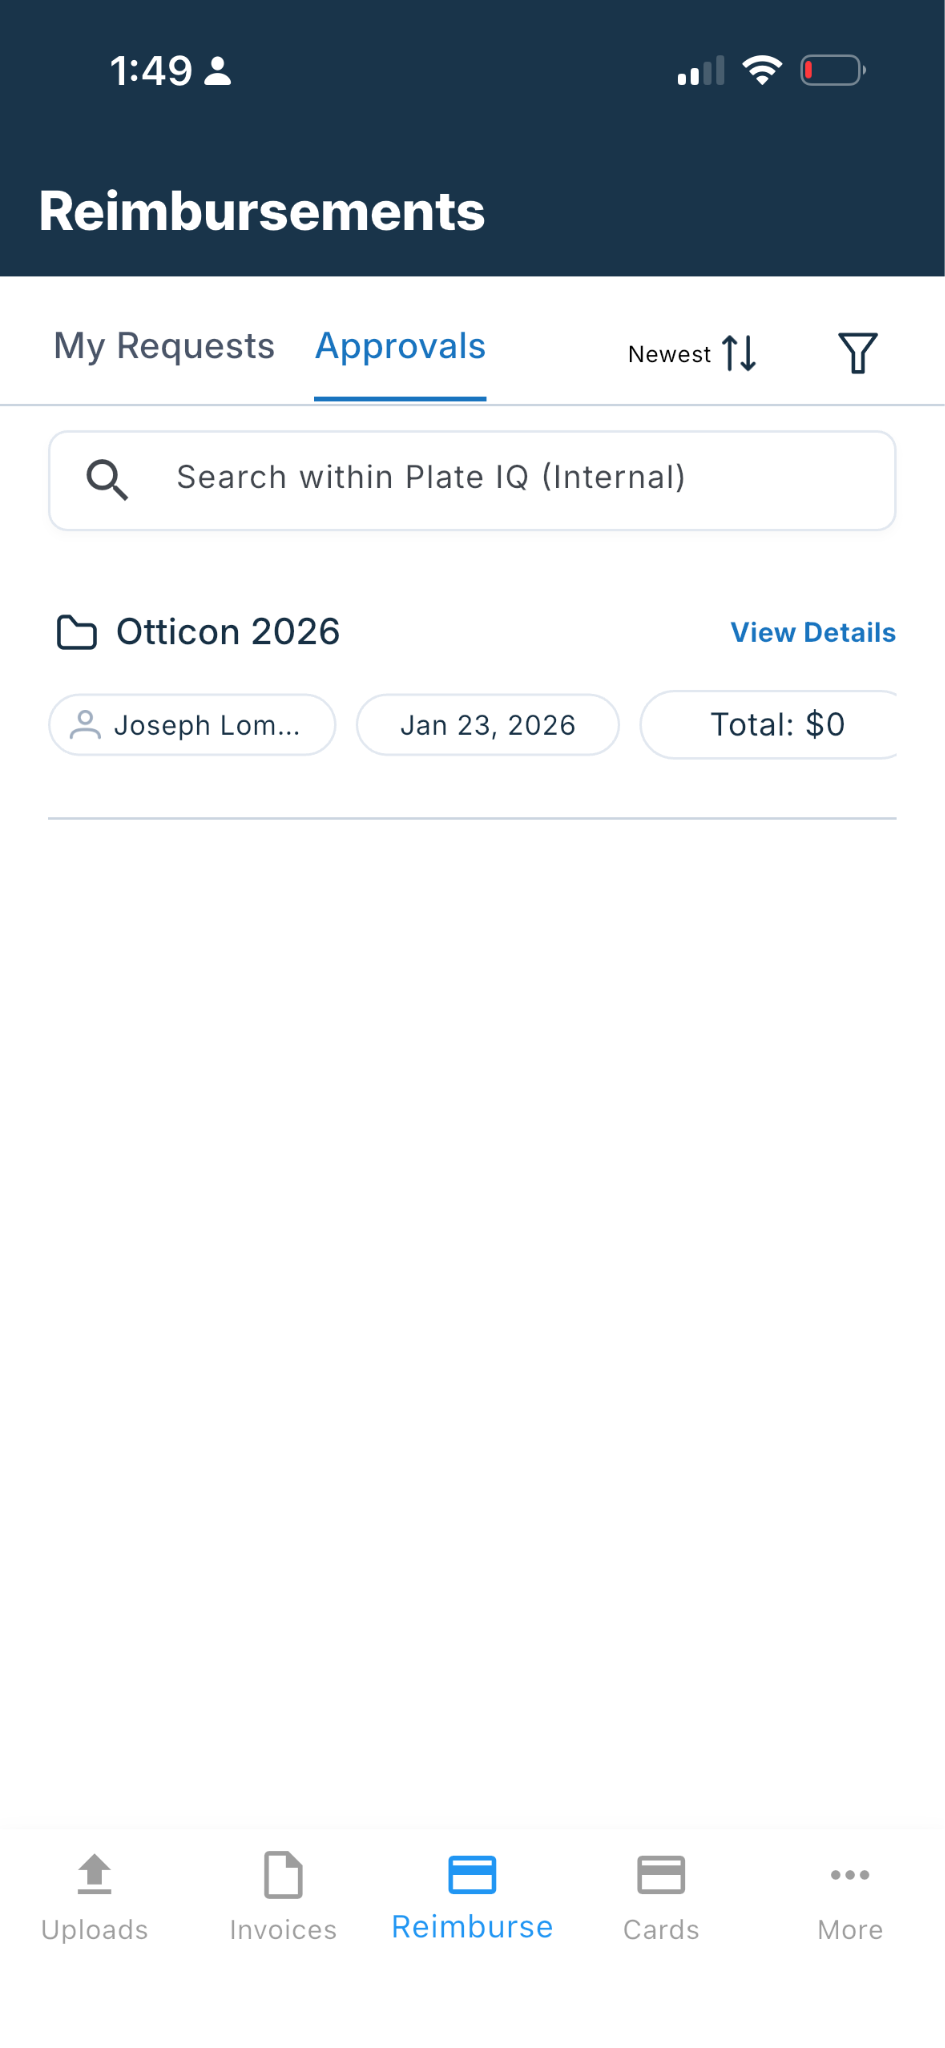
Tap View Details to review a reimbursement requiring your action.
View your cards
From the bottom navigation, tap Cards.
The Wallet view shows the cards assigned to you.
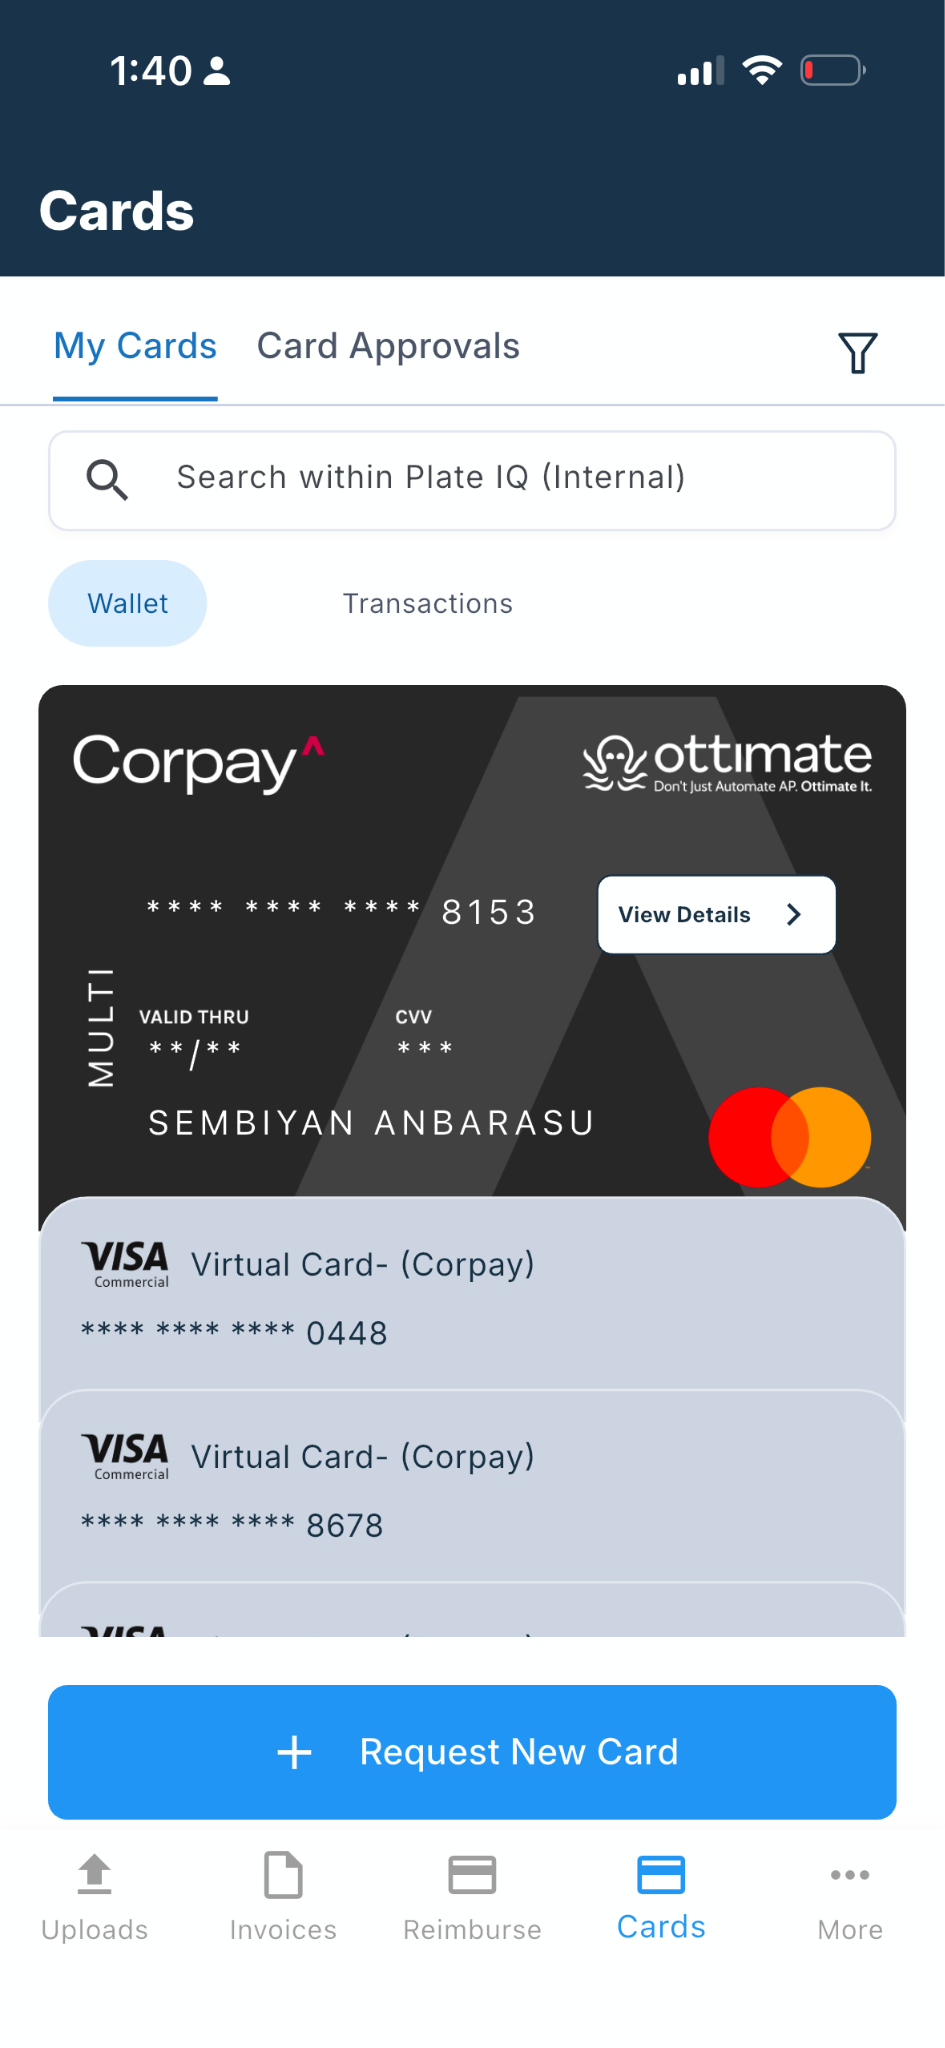
Tap View Details to review information about a card.
View card transactions
Under My Cards, select Transactions.
The list shows the merchant, transaction date, amount, card number, and completion status.
Select a transaction to review its details.
Approve card requests
Open Cards and select Card Approvals.
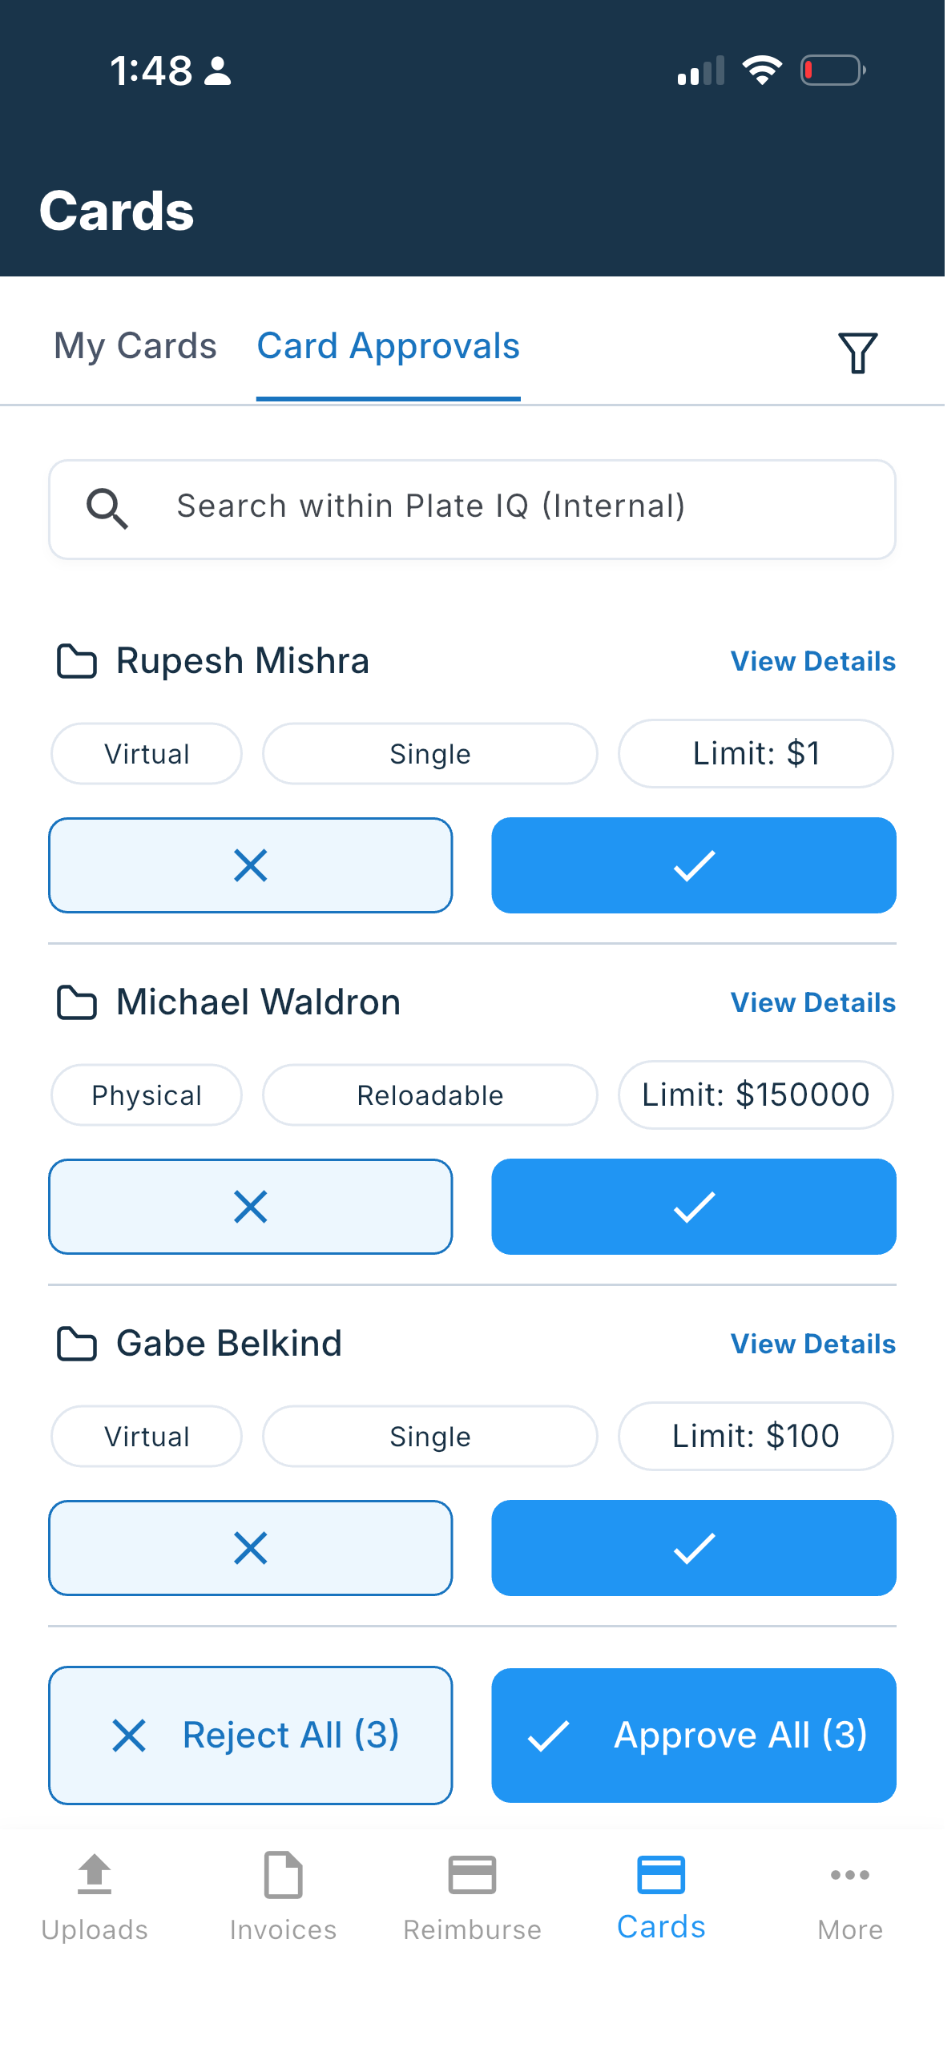
You can:
Tap View Details to review an individual request.
Approve or reject a request directly from the list.
Tap Approve All or Reject All when the same action applies to every visible request.
Manage app settings
From the bottom navigation, tap More to access app settings and notification preferences.
Was this article helpful?
That’s Great!
Thank you for your feedback
Sorry! We couldn't be helpful
Thank you for your feedback
Feedback sent
We appreciate your effort and will try to fix the article