What's Changing?
Your invoice experience is being redesigned to help you work faster, catch issues sooner, and manage more in fewer clicks. This article walks through everything that's changed and what it means for your day-to-day workflow.
Access
The redesign is rolling out to accounts in phases. Once it reaches your account, the legacy version remains available for 90 days, after which it is retired and no longer receives updates. Your exact retirement date depends on when your account receives the new design.
Watch the Video Walkthrough
For a full walkthrough of everything covered in this article - navigation, alerts, layout, line items, and bulk actions - watch the video below.
Switching Between Versions
During the transition period, you can move between the new design and the legacy version at any time.
To switch back to the legacy version:
Go to Settings > User Preferences > Design experience.
Select Legacy and confirm your choice in the dialog that appears. Keep in mind the legacy version no longer receives new features.
To return to the new design: Click Switch to new version in the top-right corner of the Invoice List or Invoice Details page, or update your selection in User Preferences.
Note: switching is available until your account's retirement date. After that, the legacy version is retired and all users move to the new design permanently.
Overview
The redesign touches navigation, alerts, layout, line item handling, and bulk actions across the invoice experience. Previously, actions were scattered line by line, issues required manual scanning to catch, and edits had to be made one at a time. The updated design experience consolidates these into a faster, more visible workflow.
Benefits
Persistent Navigation: Actions and breadcrumbs stay anchored at the top of the page, so you're not hunting for controls as you scroll. ( add images)
Proactive Alerts: Issues surface immediately in a banner, instead of requiring a manual line-by-line scan.
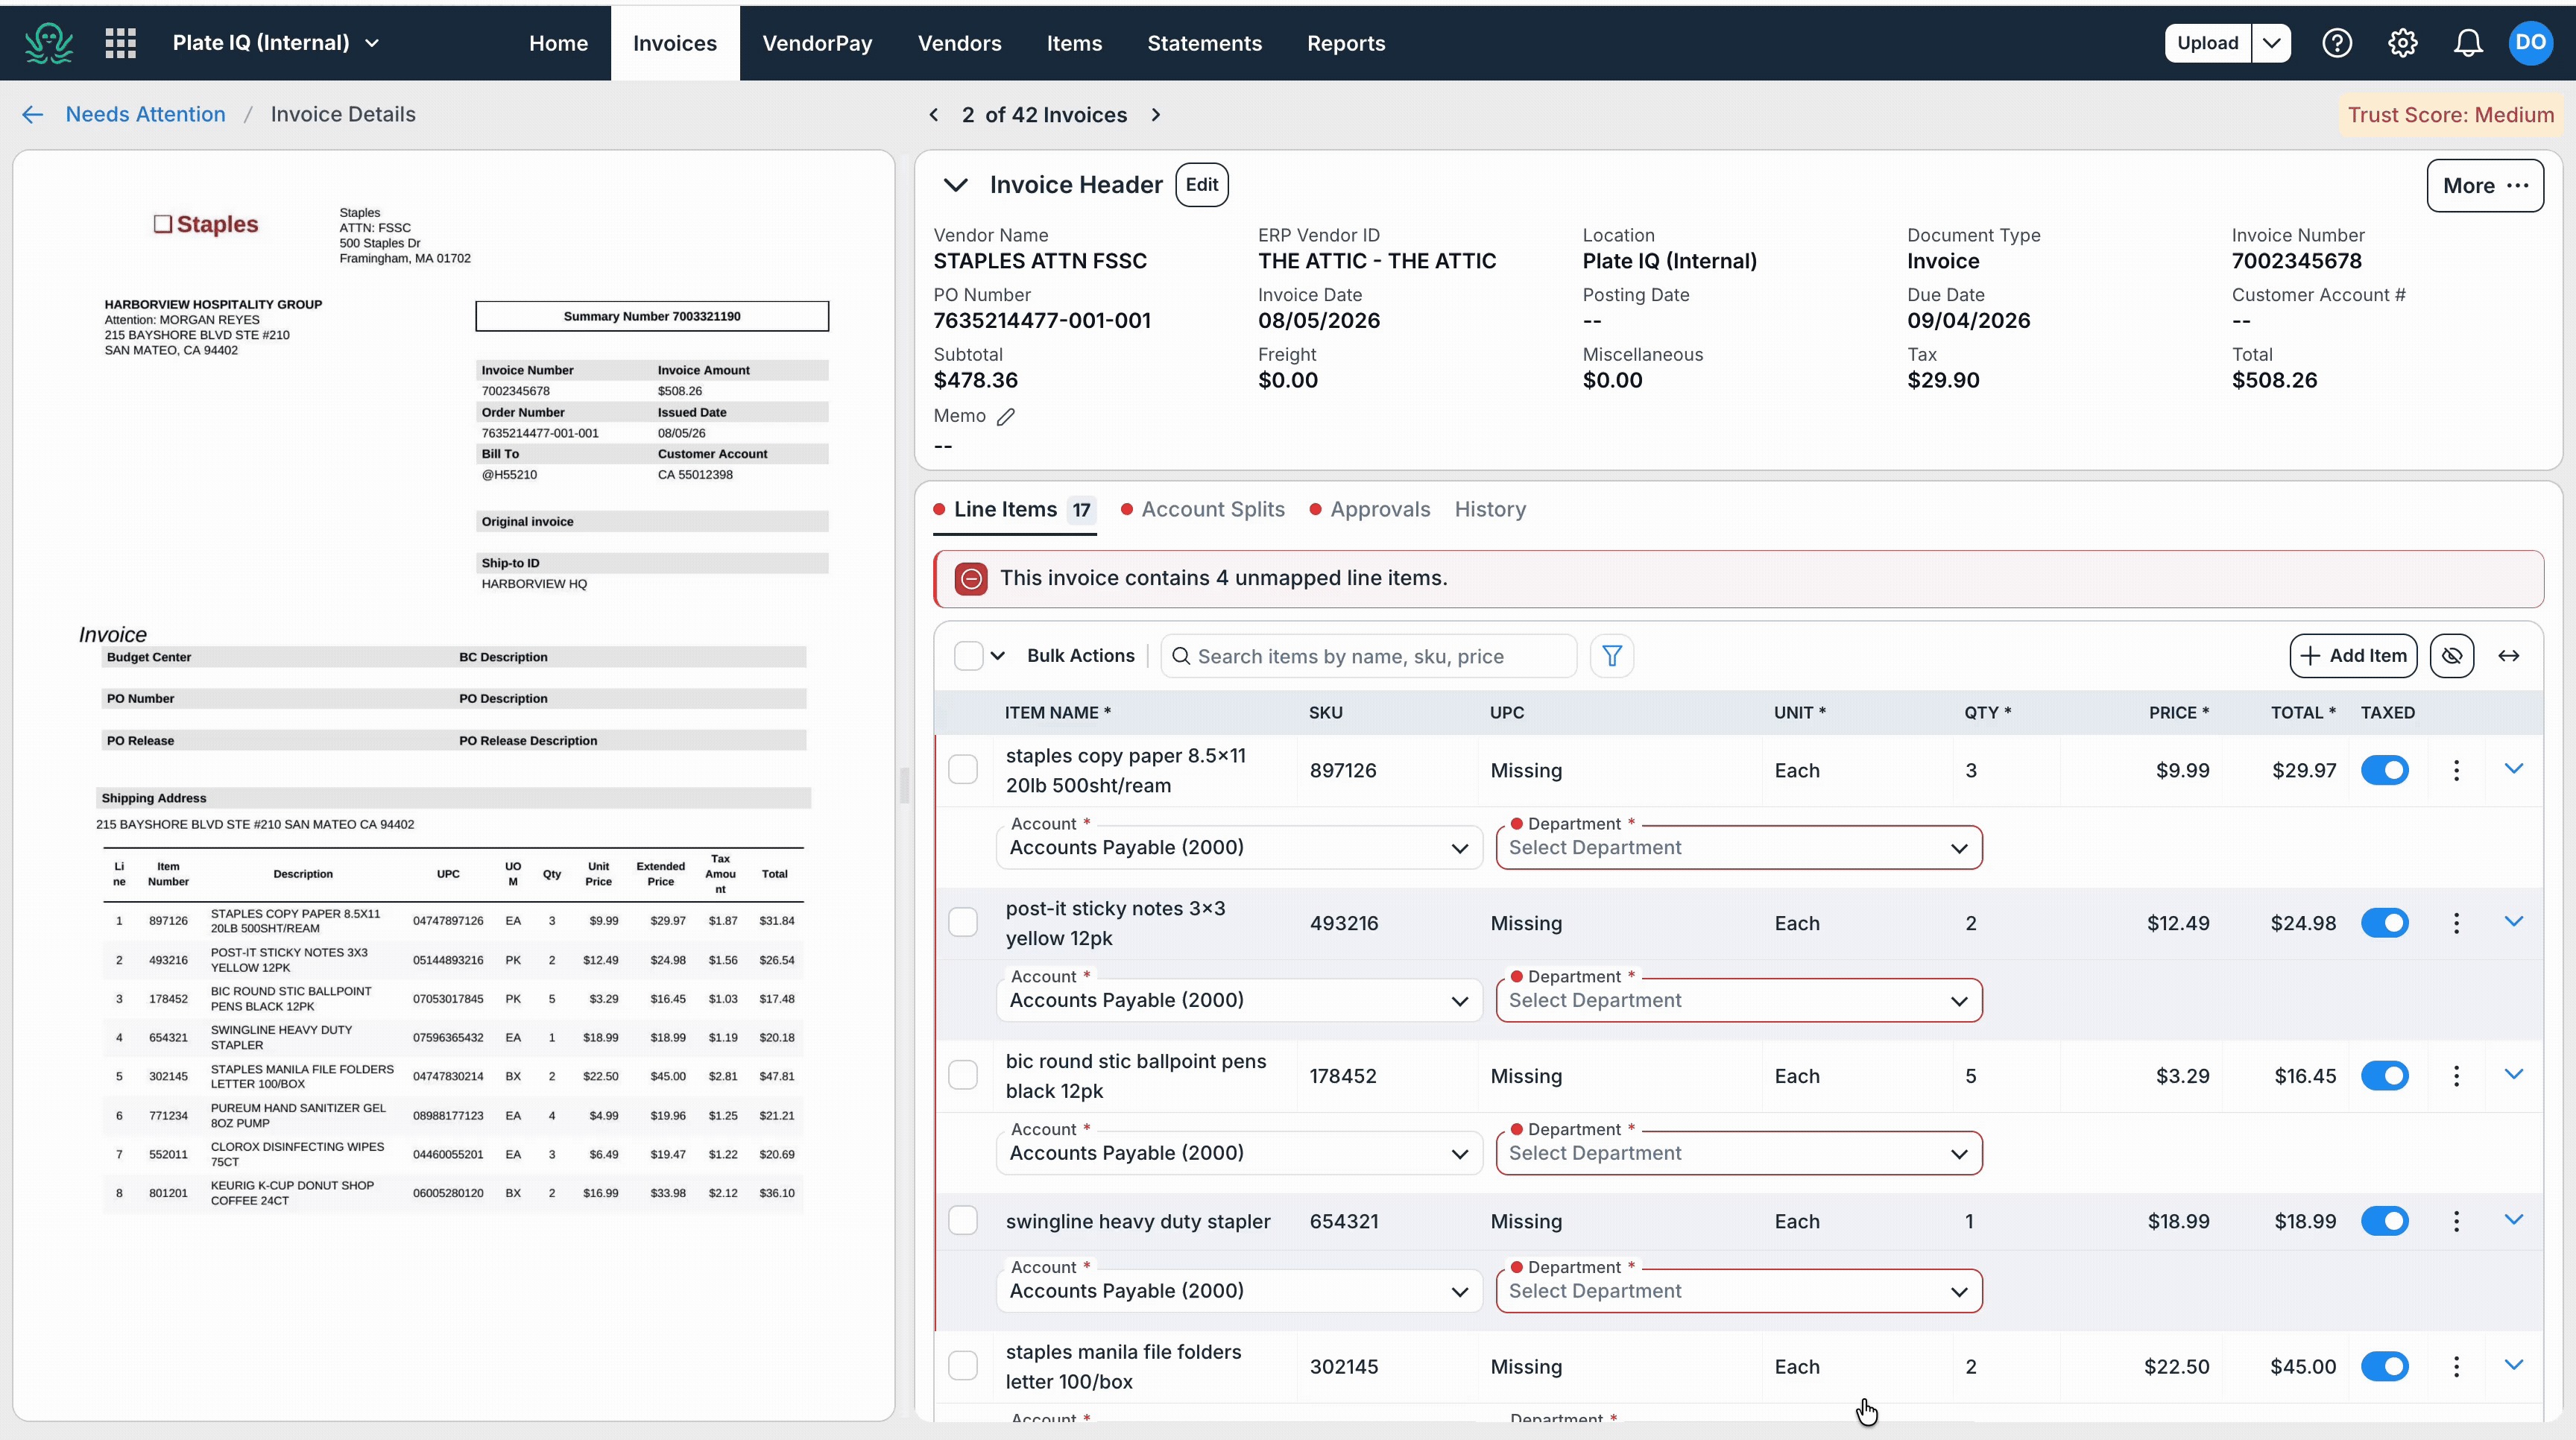
Higher Density: More of your invoice is visible on screen at once, reducing scrolling. For even more room, you can collapse the invoice header and use the hide-dimensions toggle to temporarily tuck away dimension fields. With both collapsed, significantly more line items fit on screen at once, useful when reviewing long invoices.
Clearer Line Items: Freight and miscellaneous charges are labeled and filterable for easy identification.
Bulk-First Editing: Mapping, tax, deletion, and AI suggestions can now be applied across multiple line items at once.
Reusable Filters: Filter combinations can be saved as views for one-click access later.
Using the Redesigned Experience
Navigation
The invoice detail page now keeps your most-used actions — Save and Discard — fixed at the top of the page, rather than requiring you to scroll to find them. New breadcrumbs also show your exact location as you move through an invoice, making it easy to step back without losing your place.
Alerts & Banners
Anything that needs your attention — missing fields, mismatched totals, unmapped vendors — now surfaces immediately in a banner at the top of the page. This removes the need to scan every line individually to catch a problem.
Layout & Density
For even more room, you can collapse the invoice header and use the hide-dimensions toggle to temporarily tuck away dimension fields. With both collapsed, significantly more line items fit on screen at once, useful when reviewing long invoices.
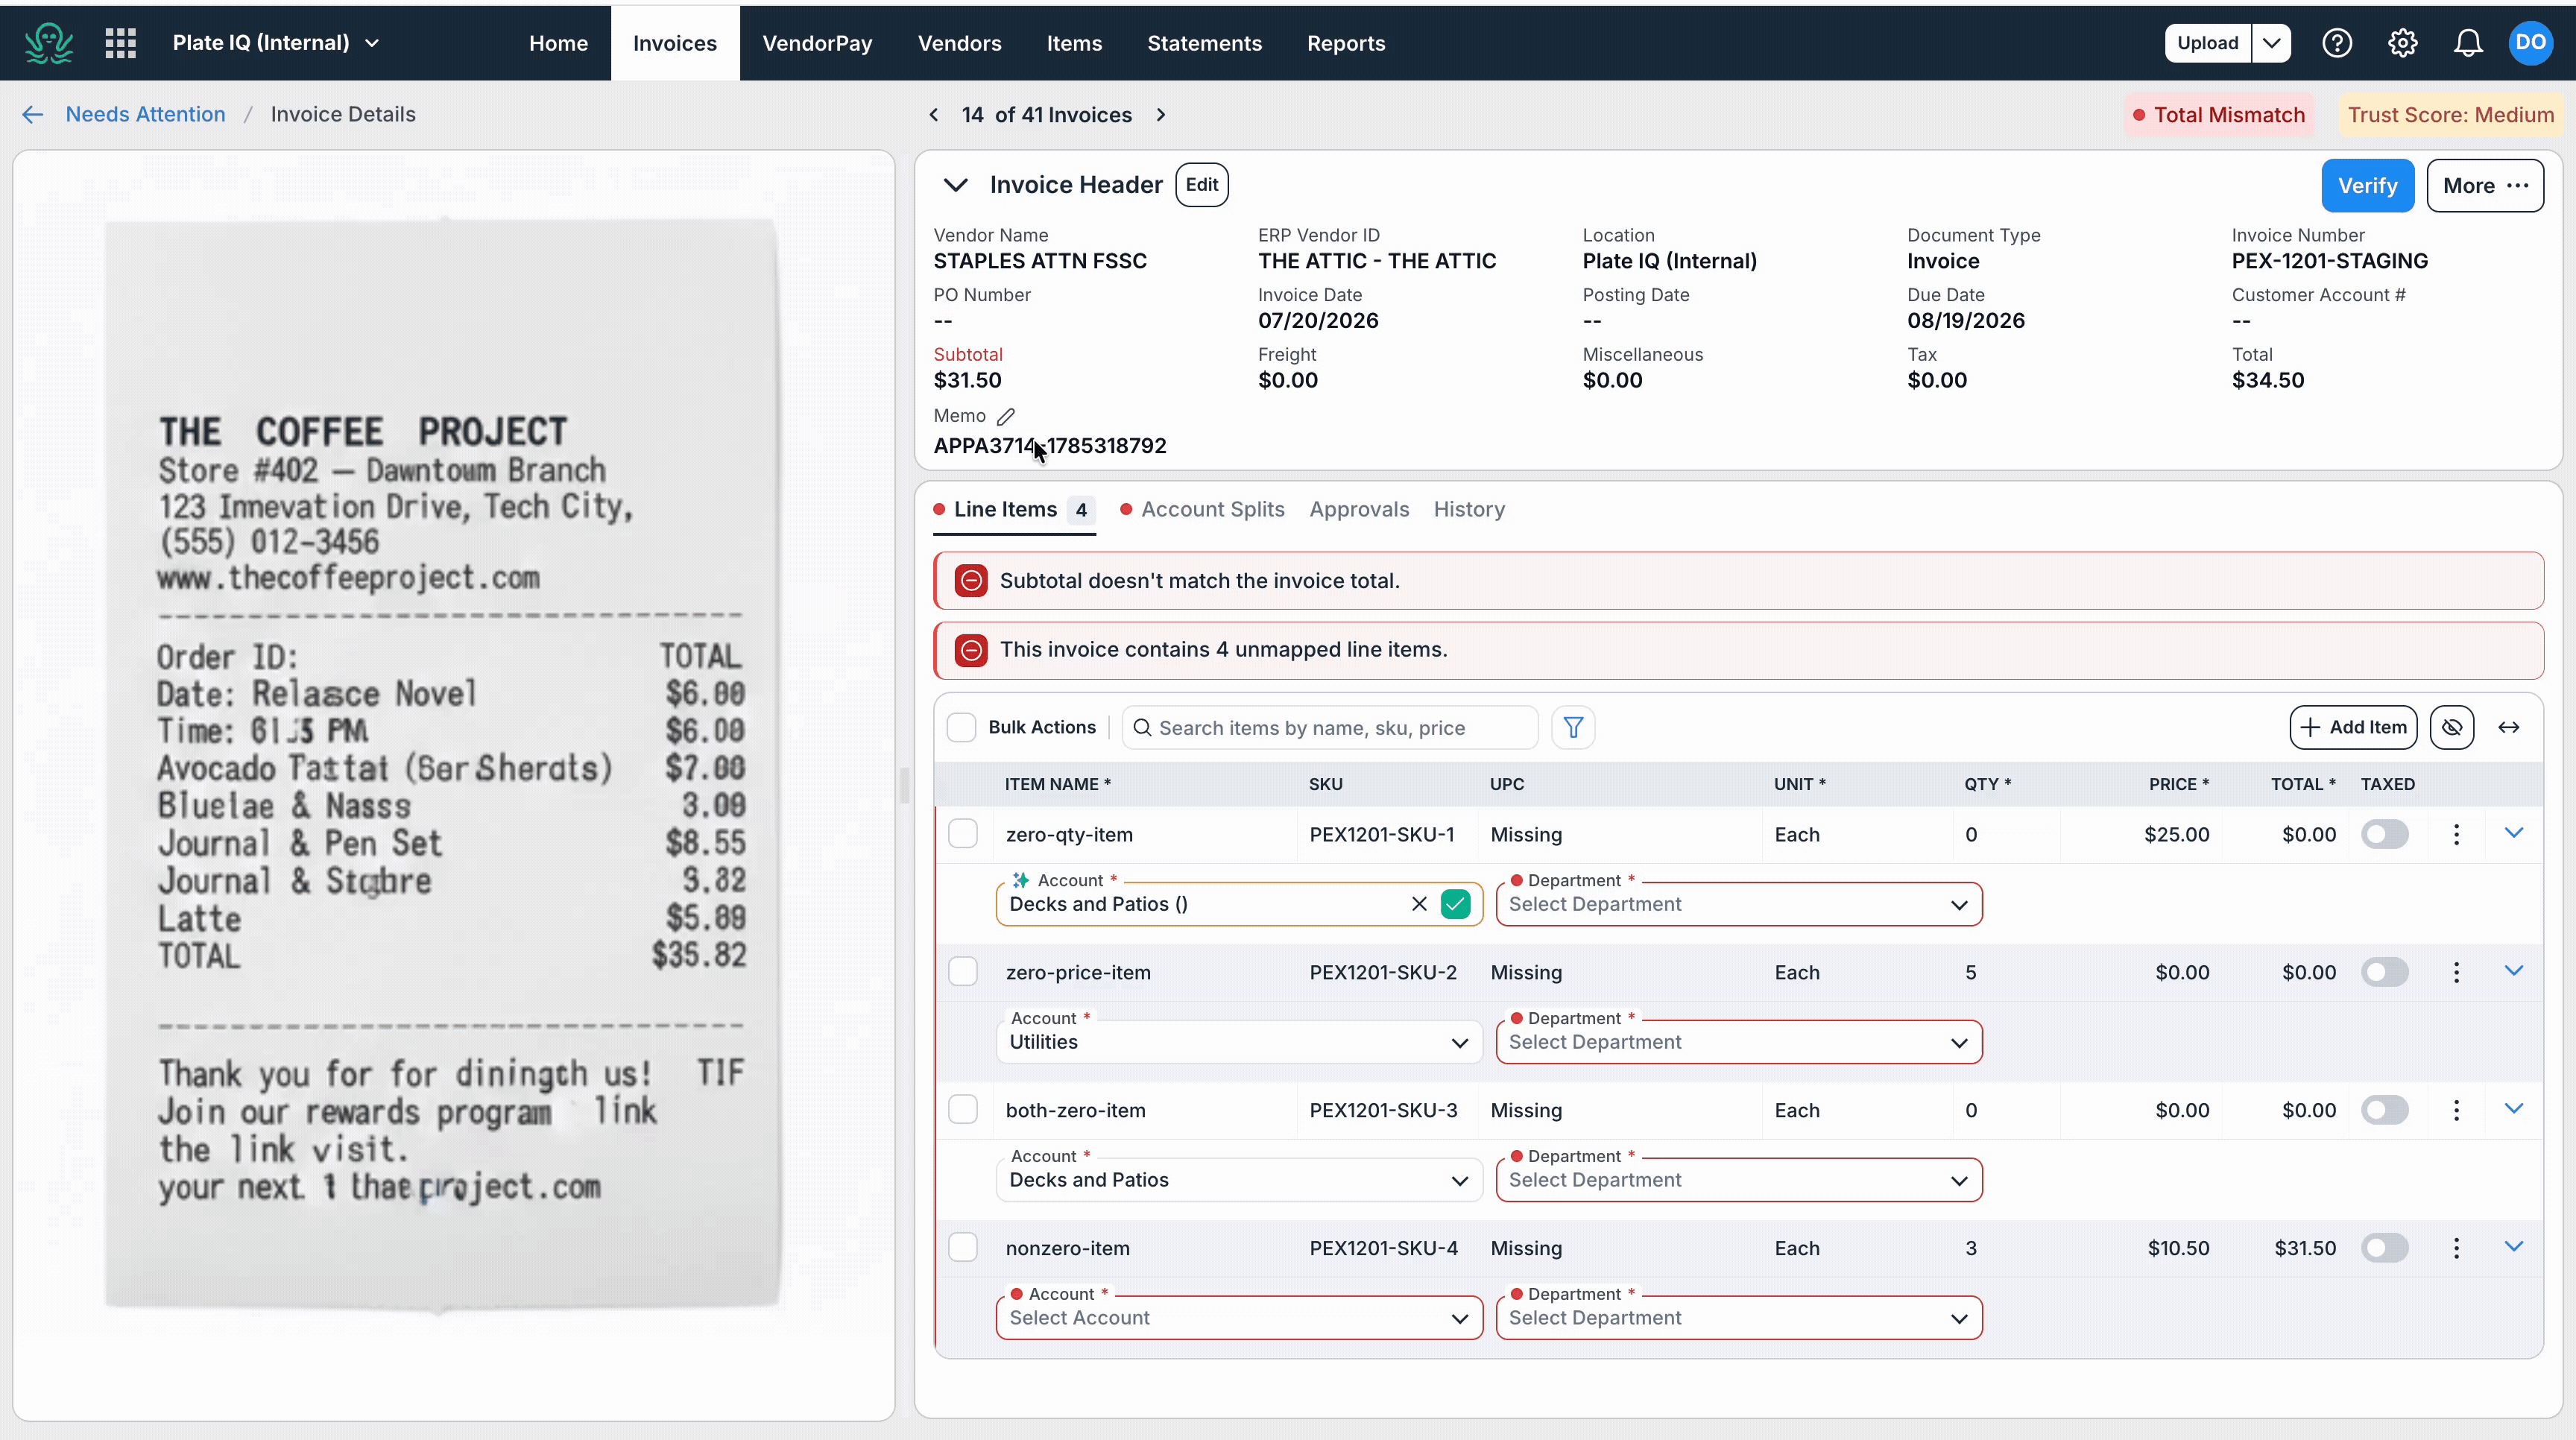
Freight & Miscellaneous Line Items
Freight and miscellaneous charges are now labeled distinctly from standard line items. A dedicated filter also lets you isolate these charge types specifically, which is useful when auditing a batch of invoices.
Using Bulk Actions
Single-line editing has been replaced with a bulk-first workflow. The entry point is the same — selecting line items — but what can be done with that selection has expanded significantly.
Steps to Use Bulk Actions
Select Line Items: Check the boxes next to any number of line items on an invoice.
Apply Changes: With items selected, you can:
Map GL codes or dimensions across all selected items
Apply tax treatment in bulk
Delete multiple line items in a single action
Accept AI suggestions across the entire selection, instead of line by line
Apply and Save: Apply and Save now work as a single combined action — update several line items, then save them all together.
Confirmation: A confirmation appears once your changes have been successfully applied and saved to all selected line items.
Using Filters and Saved Views
Overview
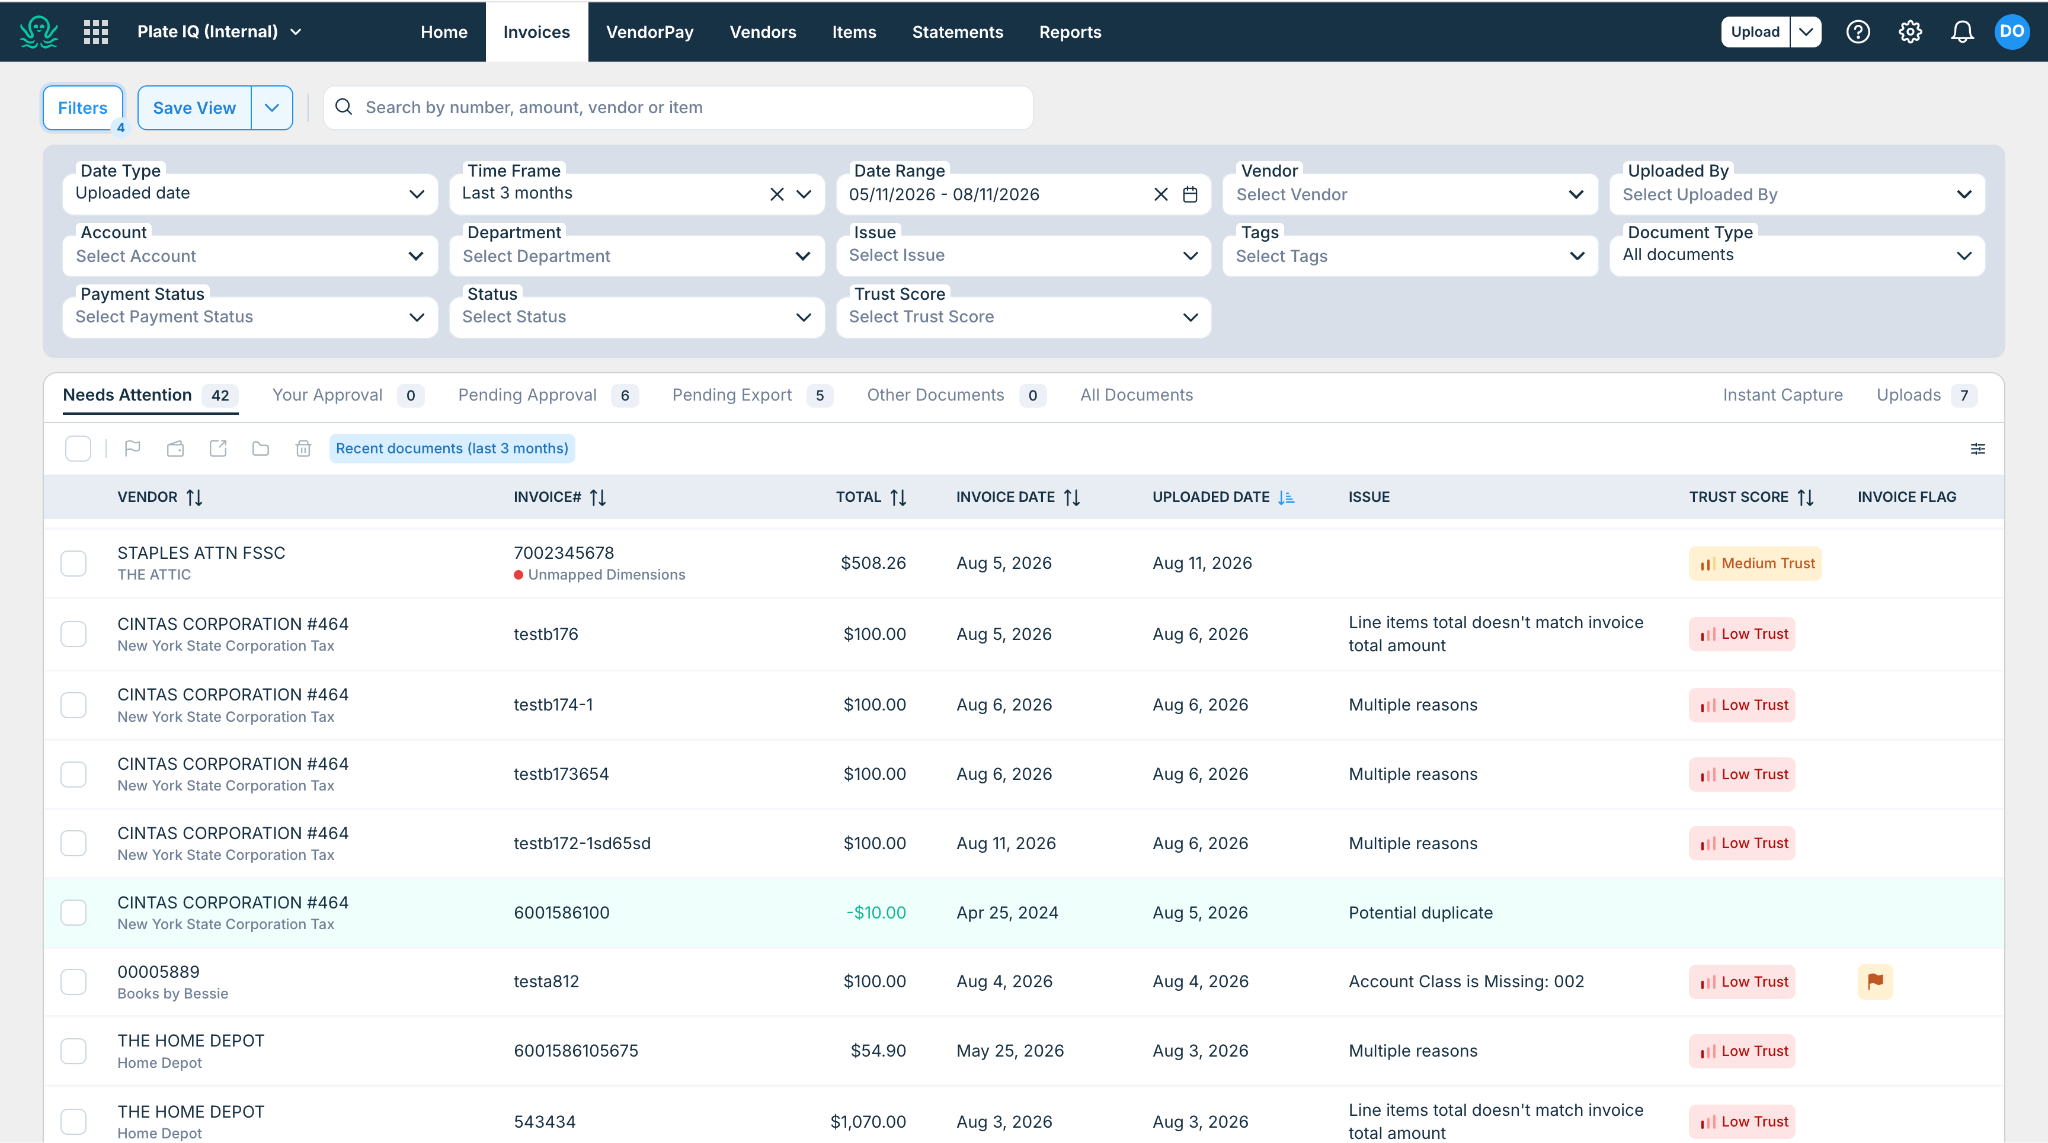
The Filters panel on the Invoice List now includes an expanded set of fields in a single view, and any filter combination can be saved for reuse.
Steps to Filter and Save a View
Open Filters: Click Filters on the Invoice List page.
Select Criteria: Choose from date type, time frame, date range, vendor, uploaded by, account, department, issue, tags, document type, payment status, status, match status, buyer, or trust score.
Save the View: Click Save View, then name it in the prompt that appears.
Access Later: Saved views appear in the Save View dropdown for one-click access, without needing to rebuild filters from scratch.
What's Not Changing
This redesign is limited to the Invoice List and Invoice Details screens. Your invoices, account settings, vendor data, and history are completely unchanged - nothing is moved, deleted, or restructured.
Approval workflows, routing, and approver assignments continue to work exactly as they do today. Export formats, scheduled exports, and integrations are unaffected. Permissions and user roles remain exactly as configured.
Need More Help?
If you run into any issues after the transition, reach out to your Ottimate support contact or submit a ticket through the Helpdesk.
Was this article helpful?
That’s Great!
Thank you for your feedback
Sorry! We couldn't be helpful
Thank you for your feedback
Feedback sent
We appreciate your effort and will try to fix the article